In the fast-paced world of digital communication, a well-crafted Gmail signature is your virtual business card. Whether you’re a professional aiming to leave a lasting impression or an individual looking to add a personal touch to your emails, a polished signature can make all the difference. In this step-by-step guide, we’ll walk you through the process of **how to create a standout Gmail signature **that reflects your personality or brand.
Step-1: Accessing Gmail Settings
The first step in creating your signature is to access your Gmail settings. Navigate to the gear icon in the top right corner of your Gmail dashboard and click on See all settings from the dropdown menu.
![]()
Step-2: Scroll Down to the Signature Section
Scroll down to find the Signature section within the General tab. Here, you can either create a new signature or edit an existing one. Click the Create new button to create a new Gmail signature.
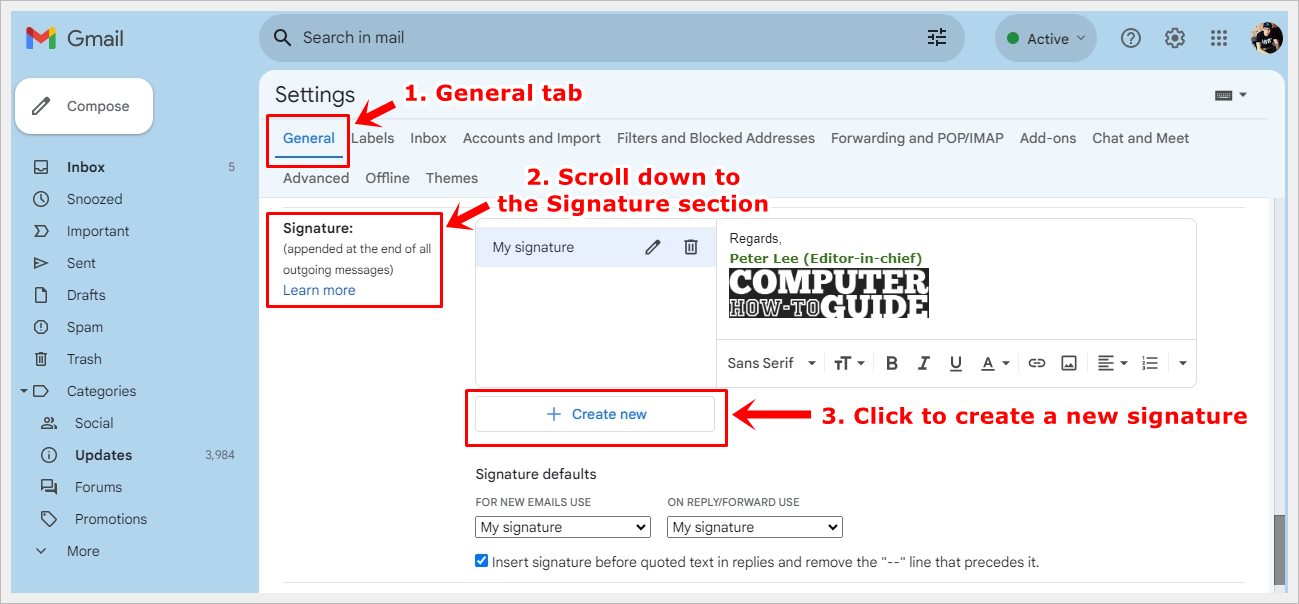
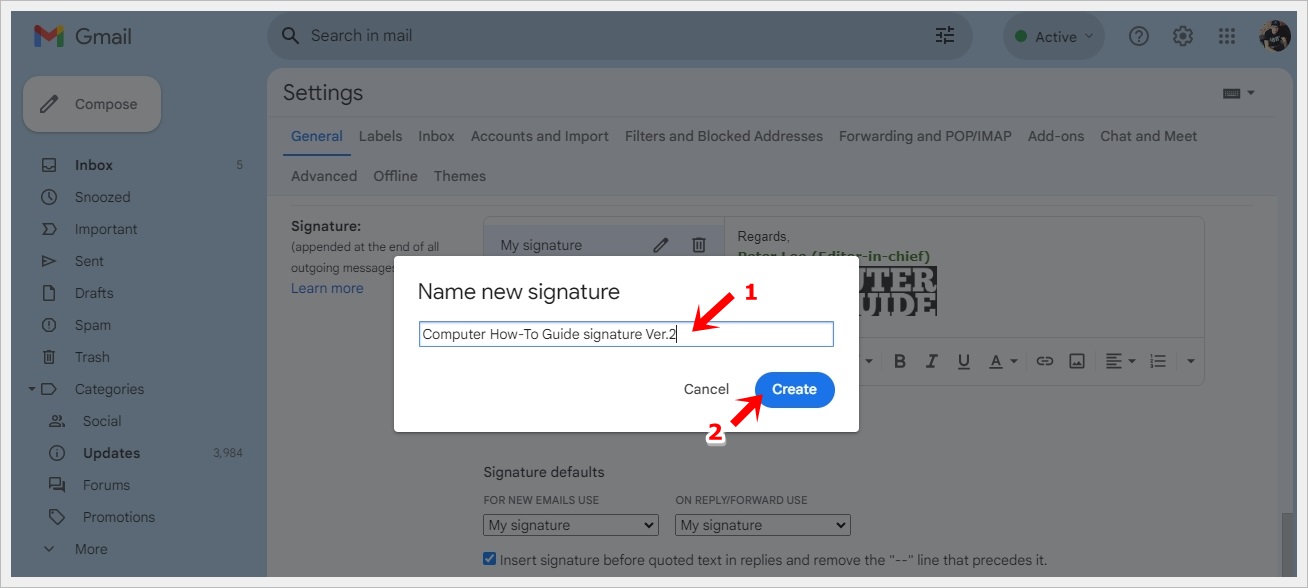
Step-3: Name Your New Signature
Give your new signature a name that you can easily identify, especially if you plan to create multiple Gmail signatures later on. Continue by hitting the Create button.
Step-4: Composing Your Signature
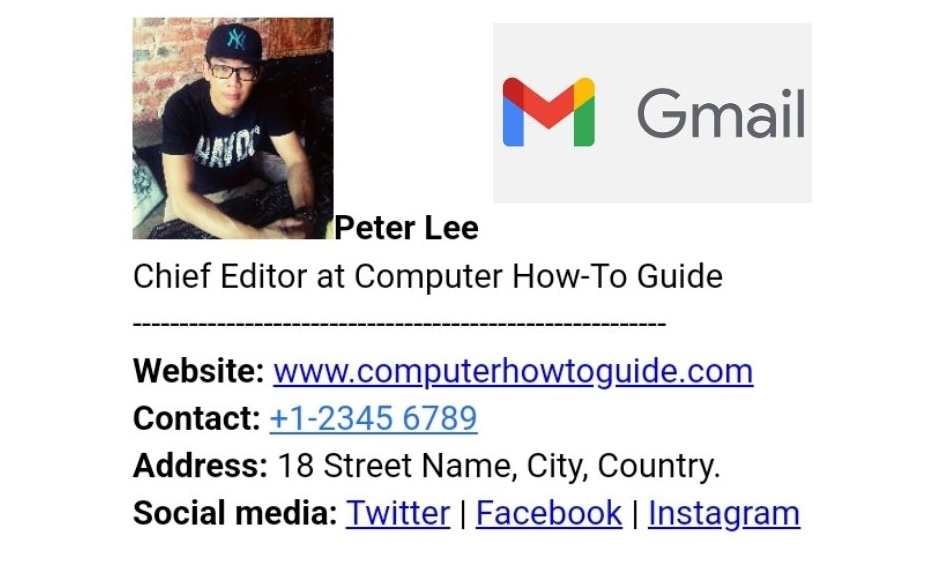
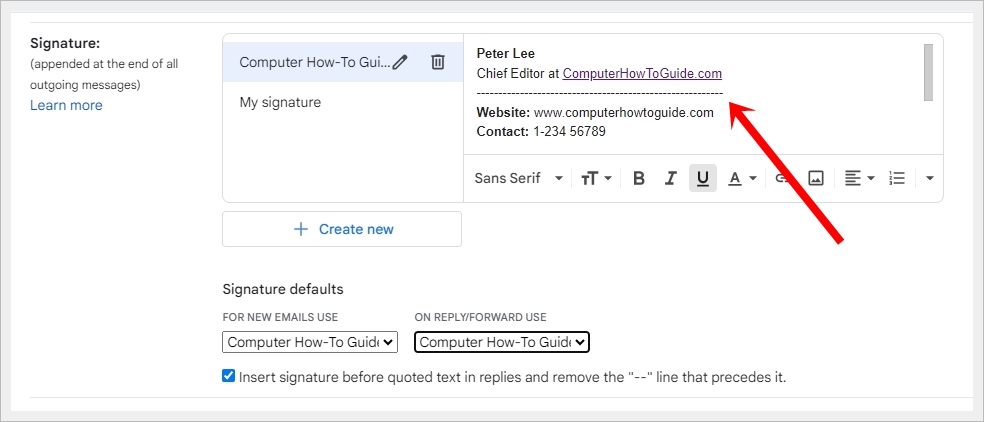
This is where you get to unleash your creativity. Compose a signature that aligns with your professional persona or personal style. Include key details such as your name, title, company, and contact information. Don’t forget to add a touch of flair with a relevant quote or a link to your website. Ditch the conventional ‘Regards’ and ‘Sincerely’; instead, inject humor into your sign-off.
Pro Tip: Keep it concise and visually appealing. Avoid clutter and unnecessary information.
Step-5: Adding a Professional Touch
To make your signature stand out, consider adding a professional logo or a profile picture. This visual element adds a touch of authenticity and helps recipients put a face to the name.
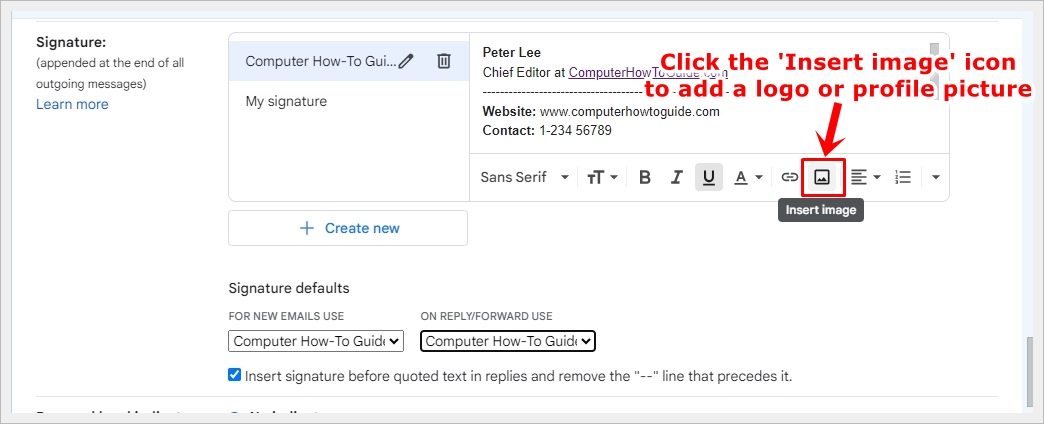 Click the ‘Insert image’ icon to add your logo or profile picture to the newly crafted Gmail signature.
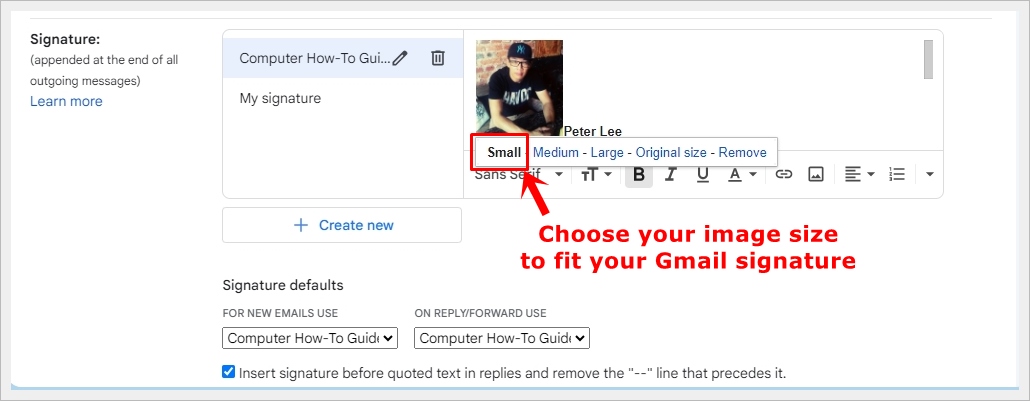 Choose an appropriate size for your image to ensure it fits nicely in your Gmail signature.
Step-6: Formatting and Styling
Gmail allows you to format your signature using different fonts, colors, and styles. Ensure that your signature is easy to read and complements your overall email aesthetics. Experiment with font sizes and colors to find the perfect balance.
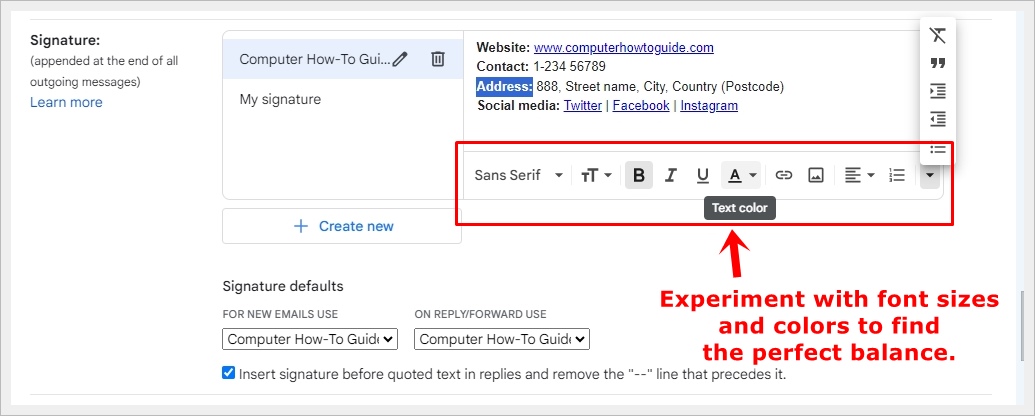
Pro Tip: Use a consistent font that aligns with your personal or brand identity.
Step-7: Include Social Media Profiles
Boost your online presence by adding links to your social media profiles. Gmail allows you to insert links that link directly to your Instagram, X (Twitter), or other social media accounts.
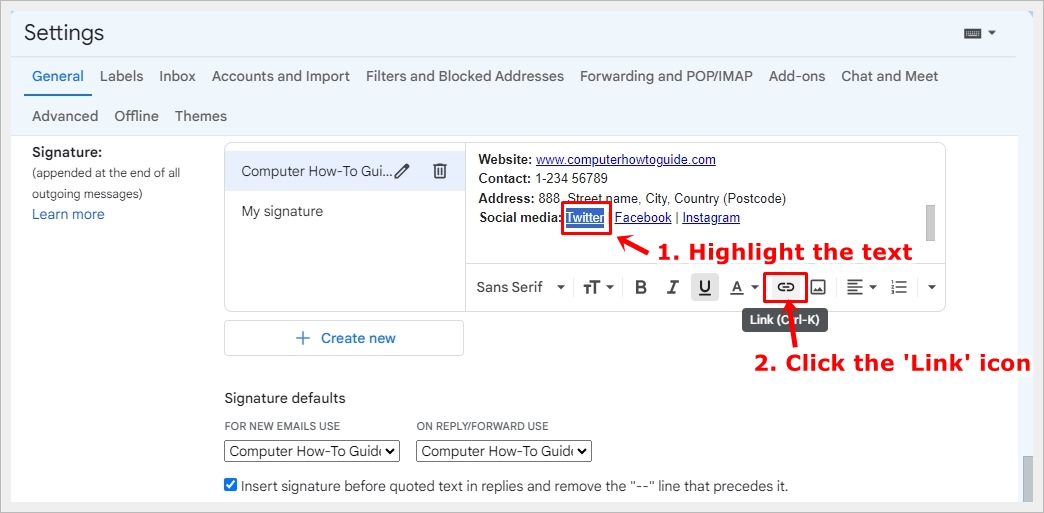 Select the text and click the ‘Link’ icon to add the link URL.
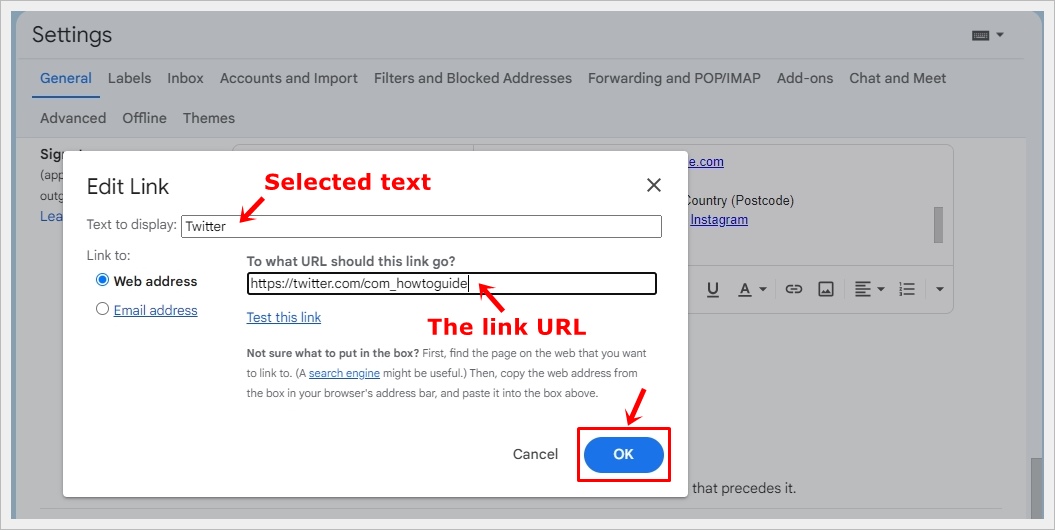 Add the link URL for the ‘Text to display’ and click the OK button to confirm the changes.
Use the same process to add links to any text you want. For example, you can add your website’s URL to link directly to your site, or include phone numbers to create clickable links that enable users to make a call when tapped from a mobile device.
Step-8: Setting Automatic Gmail Signature Insertion
You can instruct Gmail to automatically insert your signature every time you compose an email. However, it’s advisable to set No signature for reply/forward emails, especially in longer thread conversations, to avoid the accumulation of multiple signatures, which can make the email chain appear cluttered and messy.
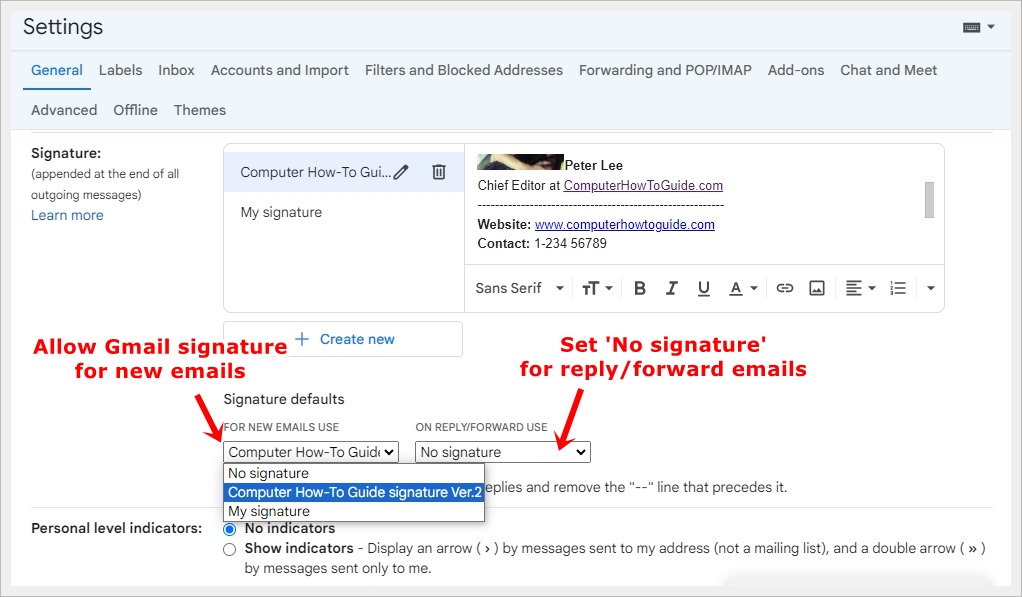 Set automatic Gmail signature insertion on new emails, while ‘No signature’ for reply/forward emails.
Step-9: Save Your Changes
After you are satisfied with your Gmail signature, scroll down and click on the Save Changes button to save your new settings.
 Click the ‘Save Changes’ button at the bottom to save your new Gmail signature and settings.
Step-10: Testing Your Signature
Before finalizing your signature, send a test email to yourself or a colleague to ensure that everything appears as intended. This step is crucial for catching any formatting issues or errors.
 Send a test email to yourself to ensure your newly created Gmail signature appears as intended.
Congratulations! You’ve now created a standout Gmail signature that reflects your professionalism and personality. A well-crafted signature not only enhances your email communication but also leaves a positive and lasting impression on your recipients.
Incorporate these steps into your Gmail routine, and watch as your emails become a true reflection of your brand or individual identity.
**Read also: **How to Turn Off Gmail 2-Step Verification (2FA) [Desktop & Mobile]
How to Create a Gmail Mobile Signature?
Yes, you can add your Gmail mobile signature on mobile. However, the Gmail mobile app currently doesn’t support adding images and hyperlinks to signatures, allowing only the creation of a simple and basic signature. The steps to create a Gmail mobile signature on Android and iPhone are very similar; in this example, we’ll demonstrate using an Android device.
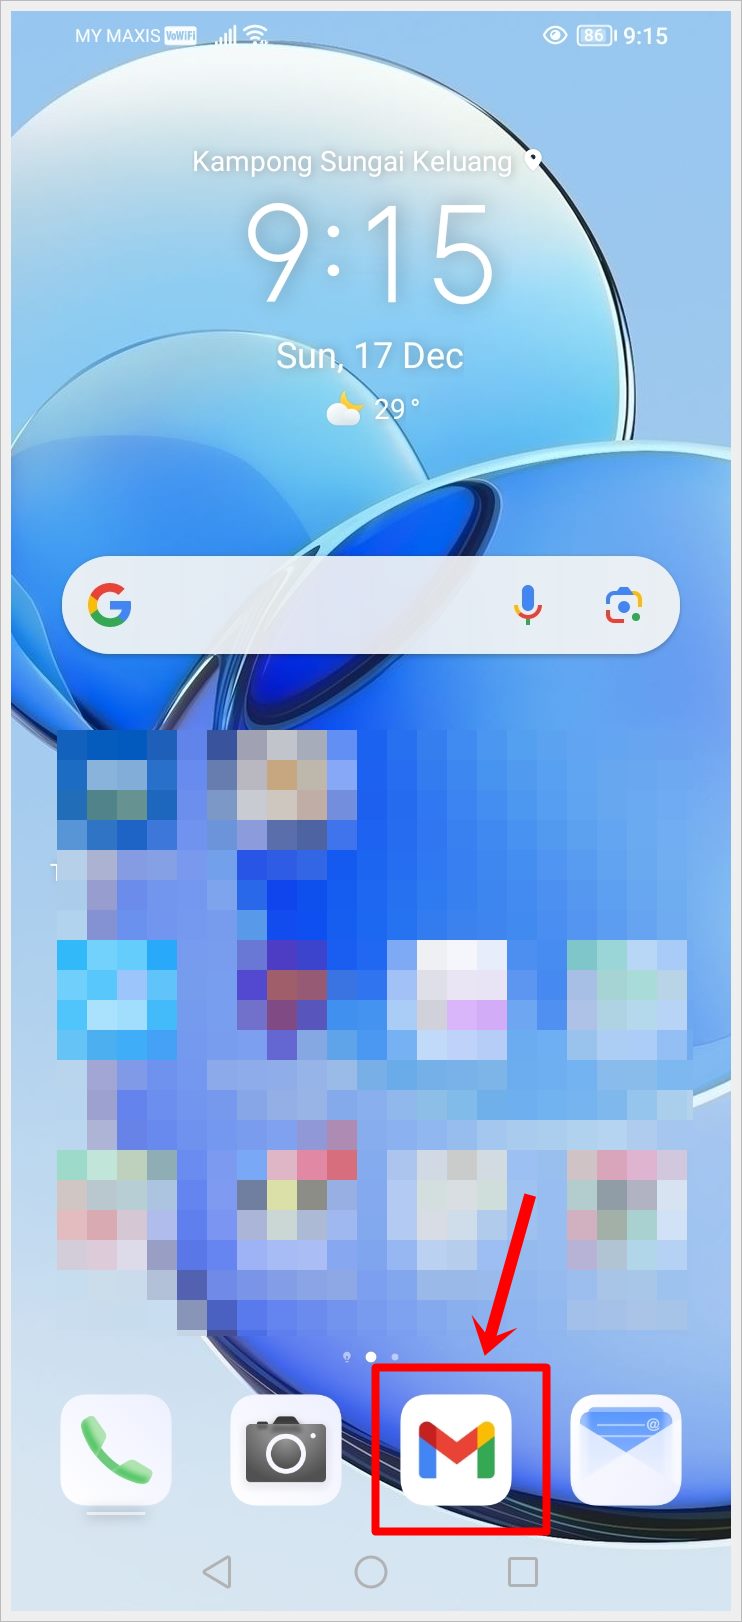
- Launch the Gmail app.
- Tap the Menu icon in the top-left corner (Represented by Three Horizontal Lines).
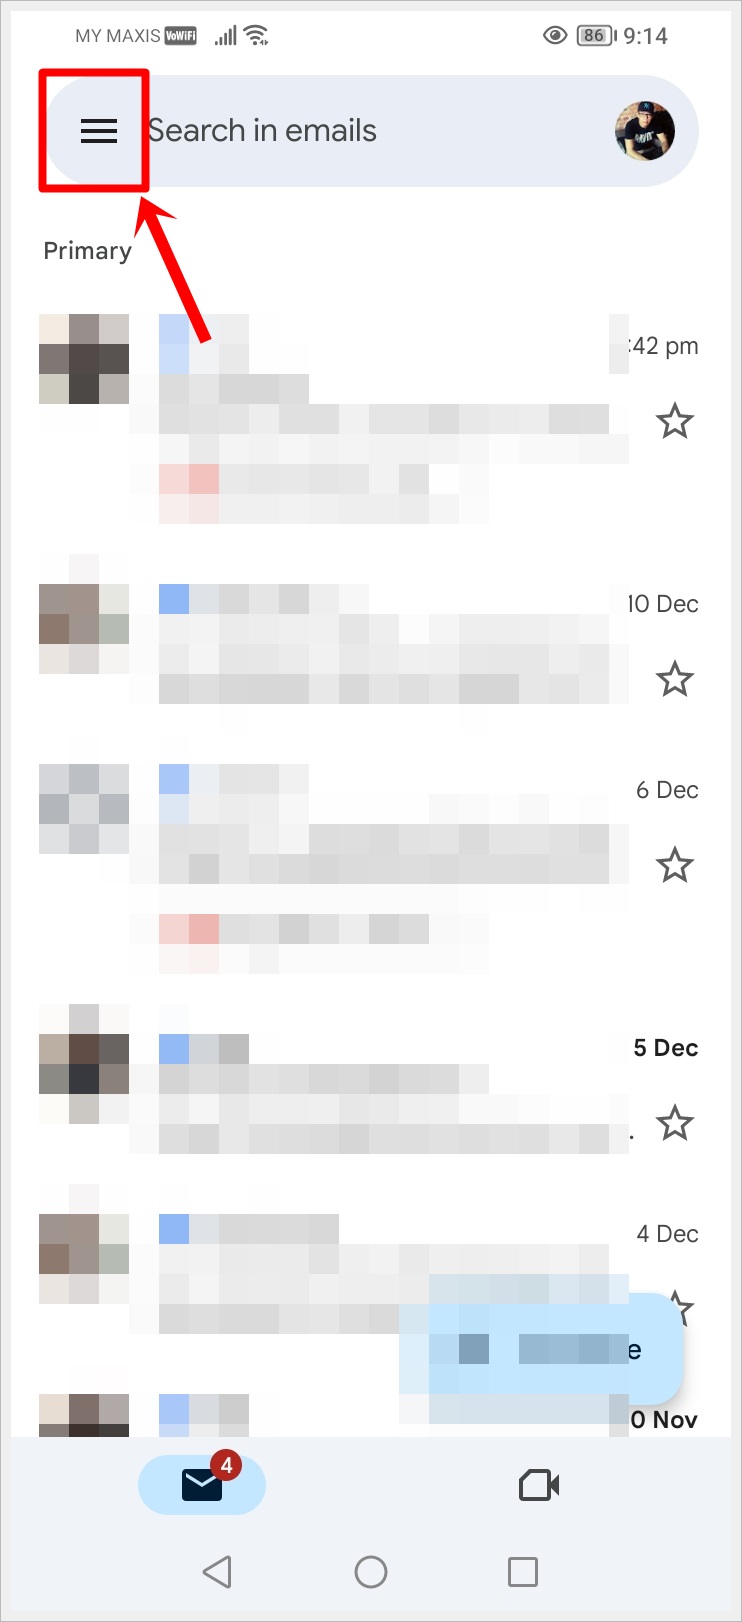
- Scroll down and select Settings.
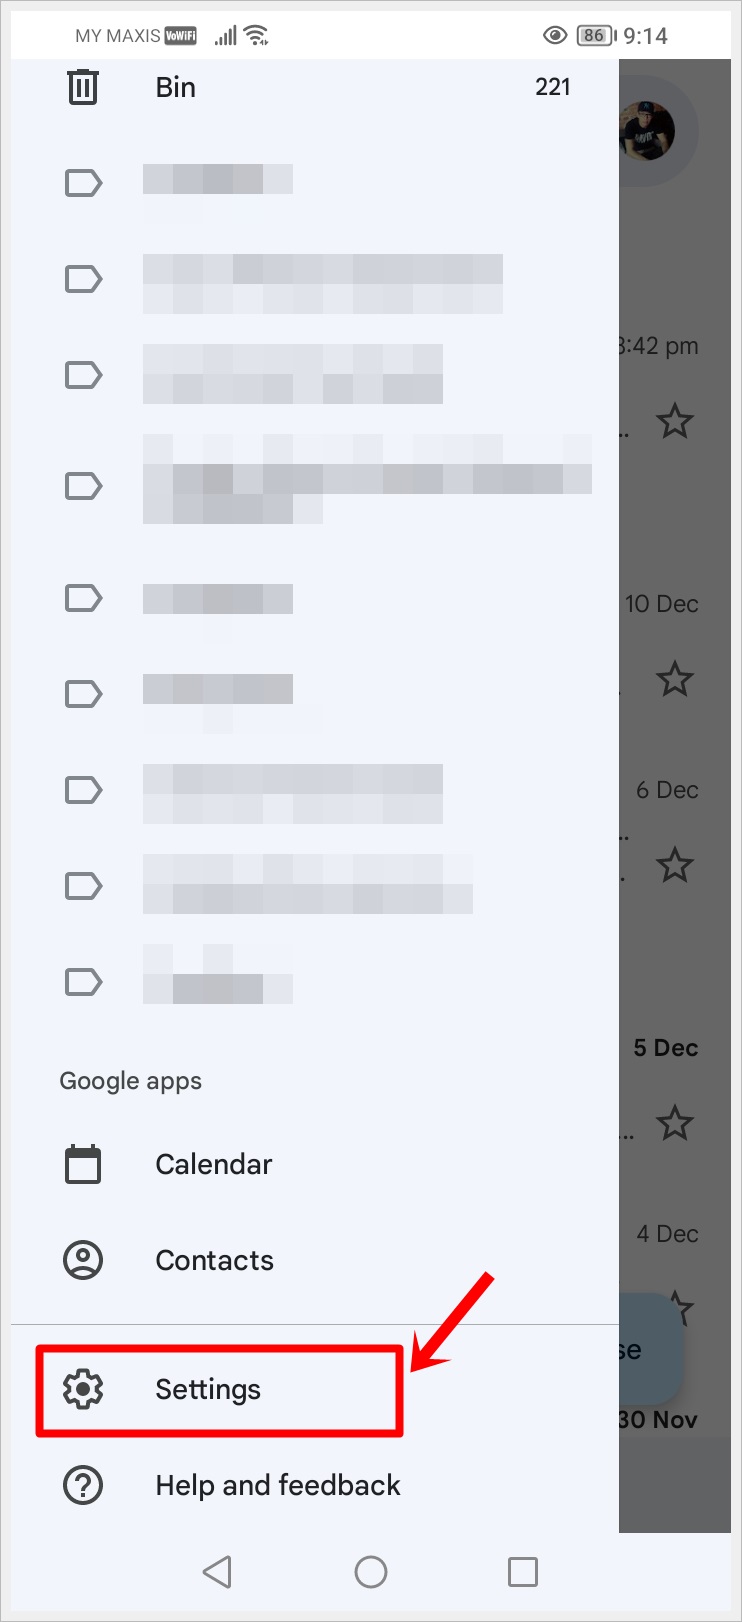
- Pick the Google Account where you wish to include a signature.
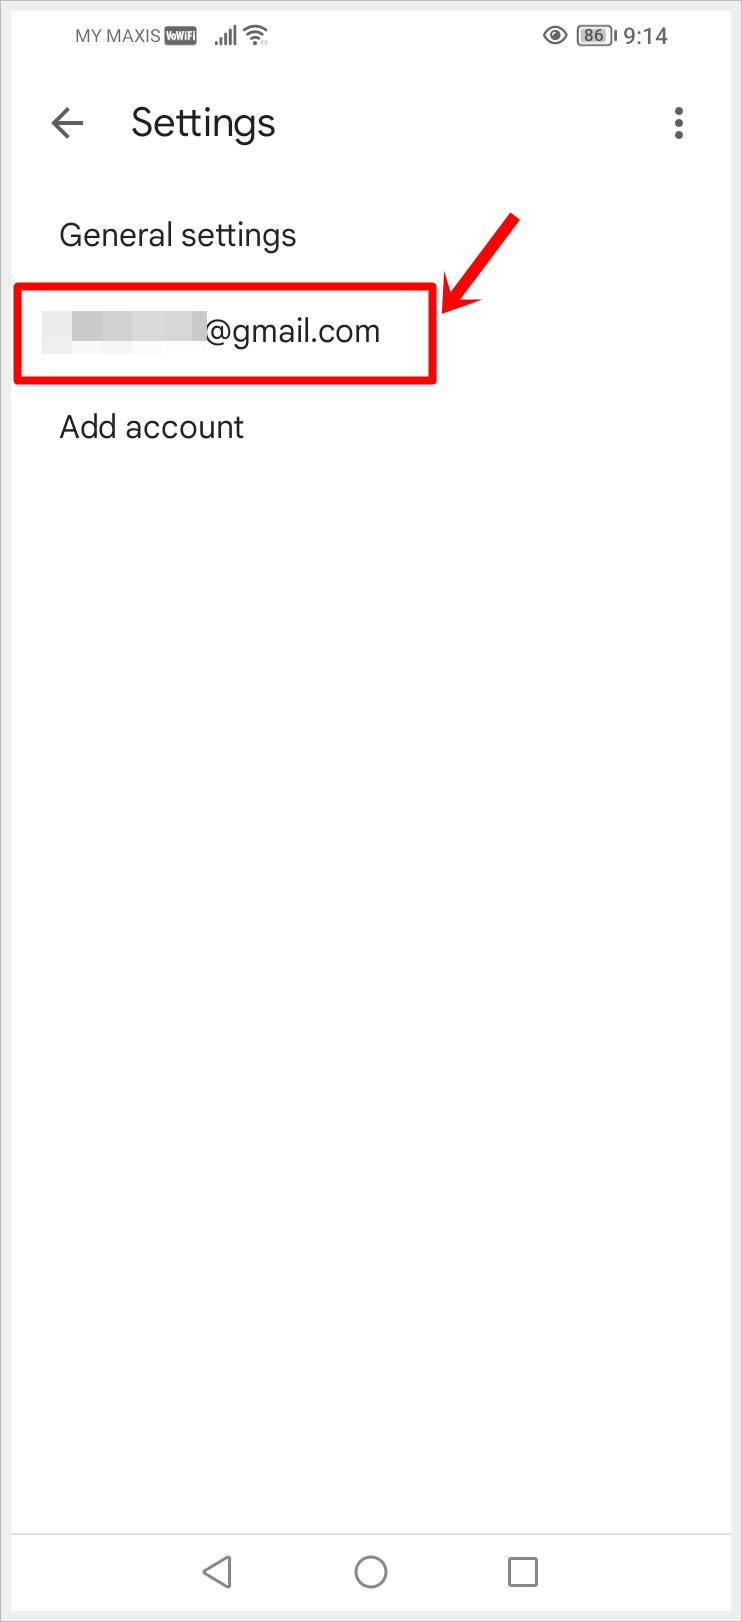
- Choose Mobile Signature.

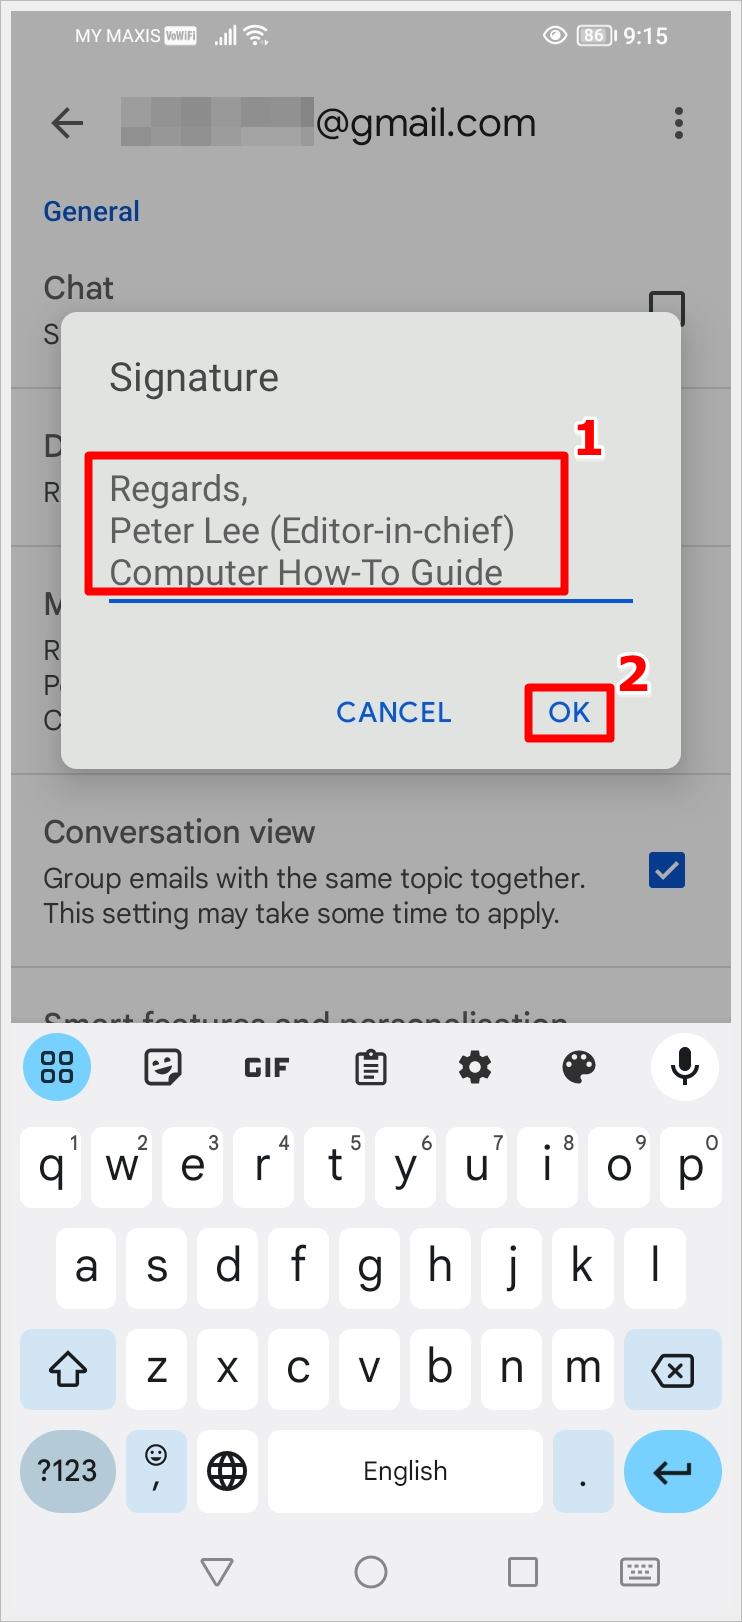
- Input your desired signature text and confirm by tapping OK.
- Compose an email to preview how your Gmail mobile signature looks (See screenshot below).
 Gmail mobile signature is very basic and simple. It lacks the capability to include images and hyperlinks.
Read also: Gmail – Why They are The Best at Keeping Your Inbox Organized
Frequently Asked Questions (FAQs)
Q: Can I use HTML coding to customize my Gmail signature further?
A: Yes, Gmail allows some HTML customization for your signature. In the signature settings, you can click on the “Insert image” icon and choose the “Web address (URL)” option to add images via HTML. However, note that complex HTML might not render well across all email clients.
Q: Is it possible to have different signatures for different email aliases in Gmail?
A: Currently, Gmail associates a single signature with your entire account, irrespective of the email alias used. If you need different signatures, you may consider creating multiple Gmail accounts, each with its unique signature.
Q: Can I include clickable social media icons in my Gmail signature?
A: Yes, Gmail allows you to include clickable social media icons in your signature. You can do this by using the “Insert image” option and linking each image to your respective social media profiles. Ensure that the icons are hosted online for proper functionality.
Read also: How to Change Your Gmail Address (3 Quick and Easy Ways)
Final Thoughts
As technology evolves, so does the importance of personal branding. By taking the time to create a distinctive Gmail signature, you’re not just sending emails; you’re making a statement. Elevate your email game today!
***Remember: *Your signature is your digital handshake – make it memorable.
Additional Resources: