Google Photos offers a convenient way to store and organize your precious memories, but not everyone wants their entire photo library automatically backed up. If you’re looking to take control of your photo backups, you’re in the right place. In this guide, we’ll walk you through the steps to stop auto backup on Google Photos for Android and iOS.
![]() Image by ijeab on Freepik
Image by ijeab on Freepik
Why Stop Google Photos Auto Backup?
Auto backup can quickly fill up your free 15GB Google storage limit, and not all users prefer to have every photo and video synced to the cloud. By disabling auto backup, you gain more control over your storage space and the content you want to upload.
Also read: How to Check the Number of Photos You Have in Google Photos
How to Stop Google Photos Auto Backup on Android:
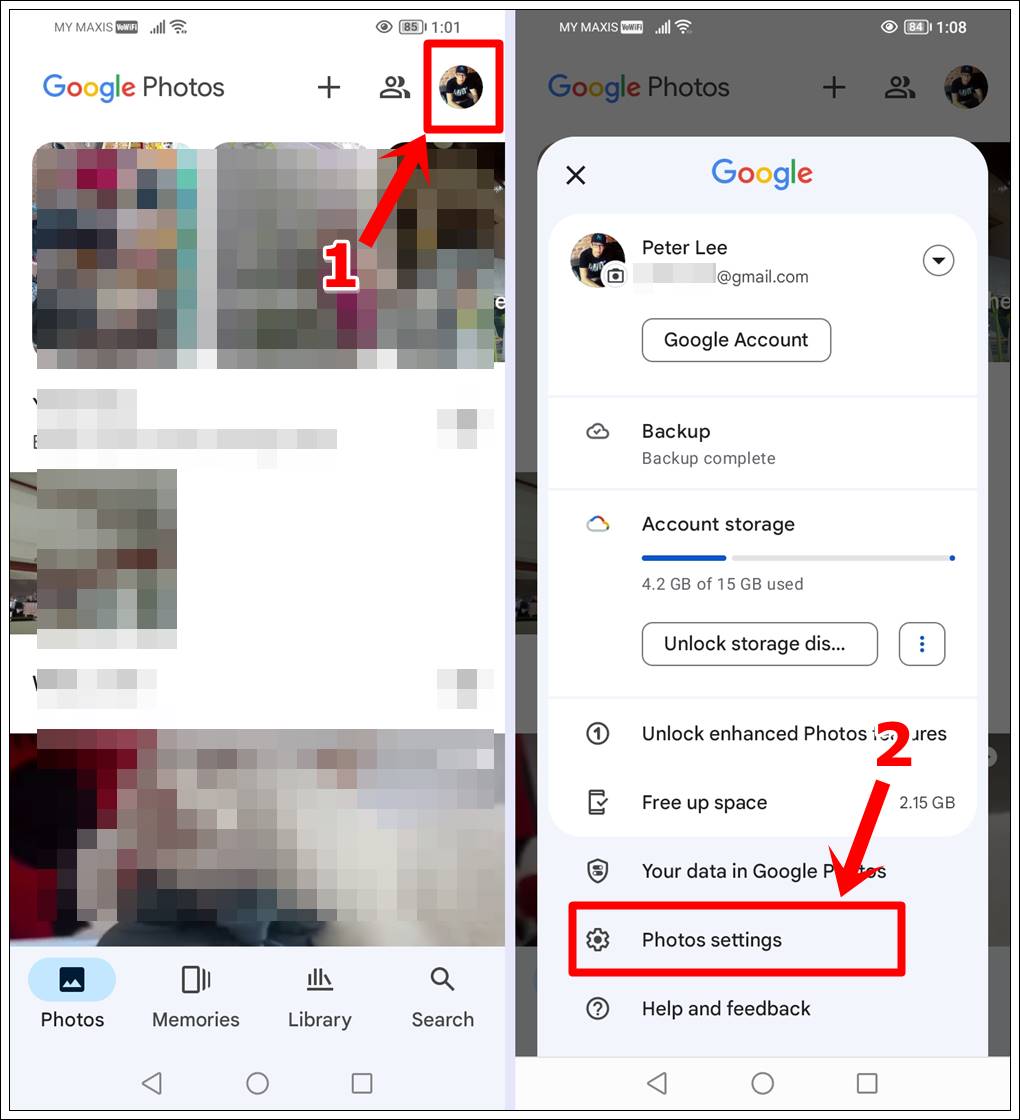
Step 1: Open Google Photos App
Launch the Google Photos app on your Android device. If not installed, download it from the Google Play Store.
![]()
Step 2: Access Settings
Tap your Profile Picture in the top-right corner, followed by the Photos Settings option.
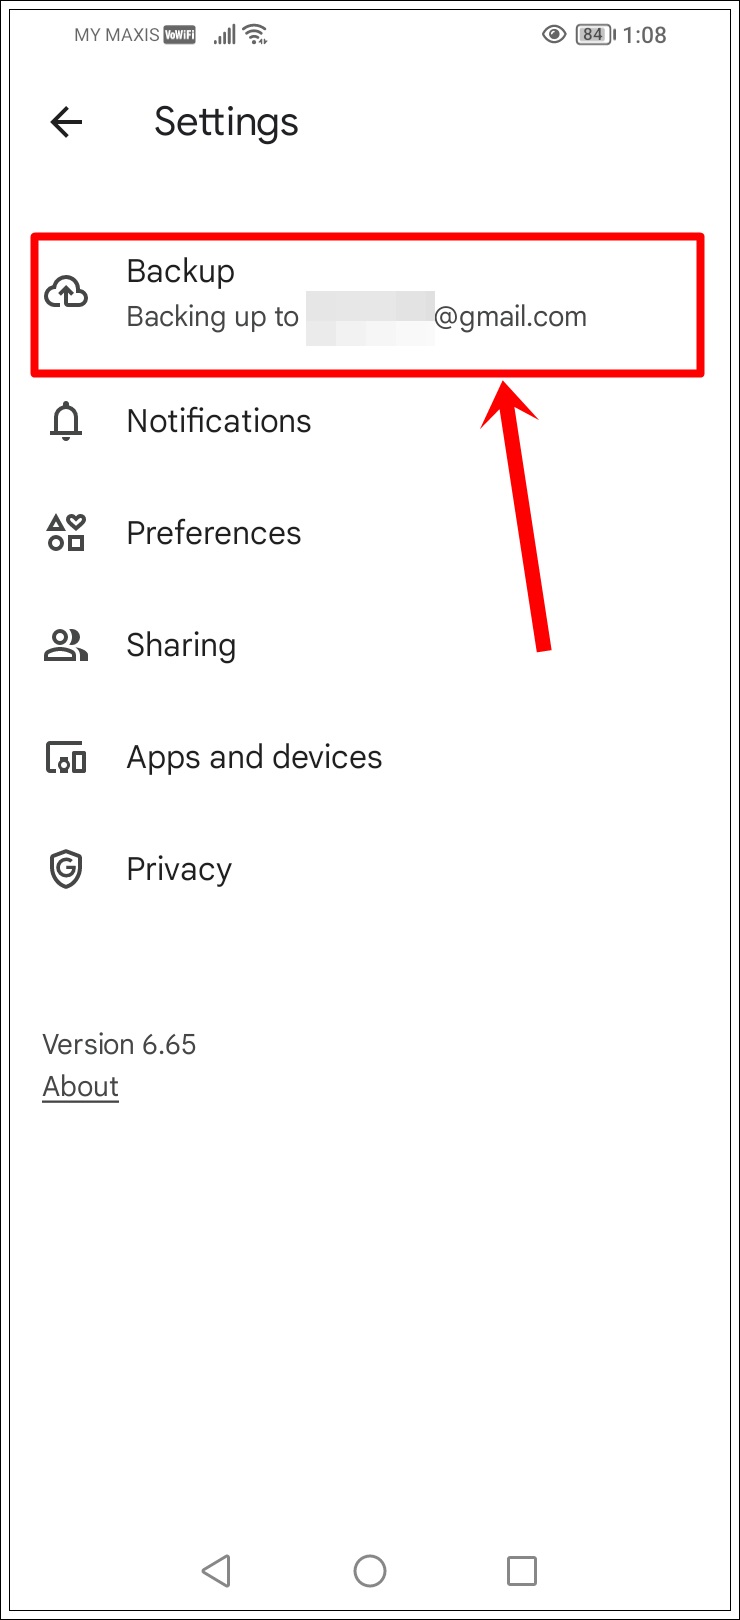
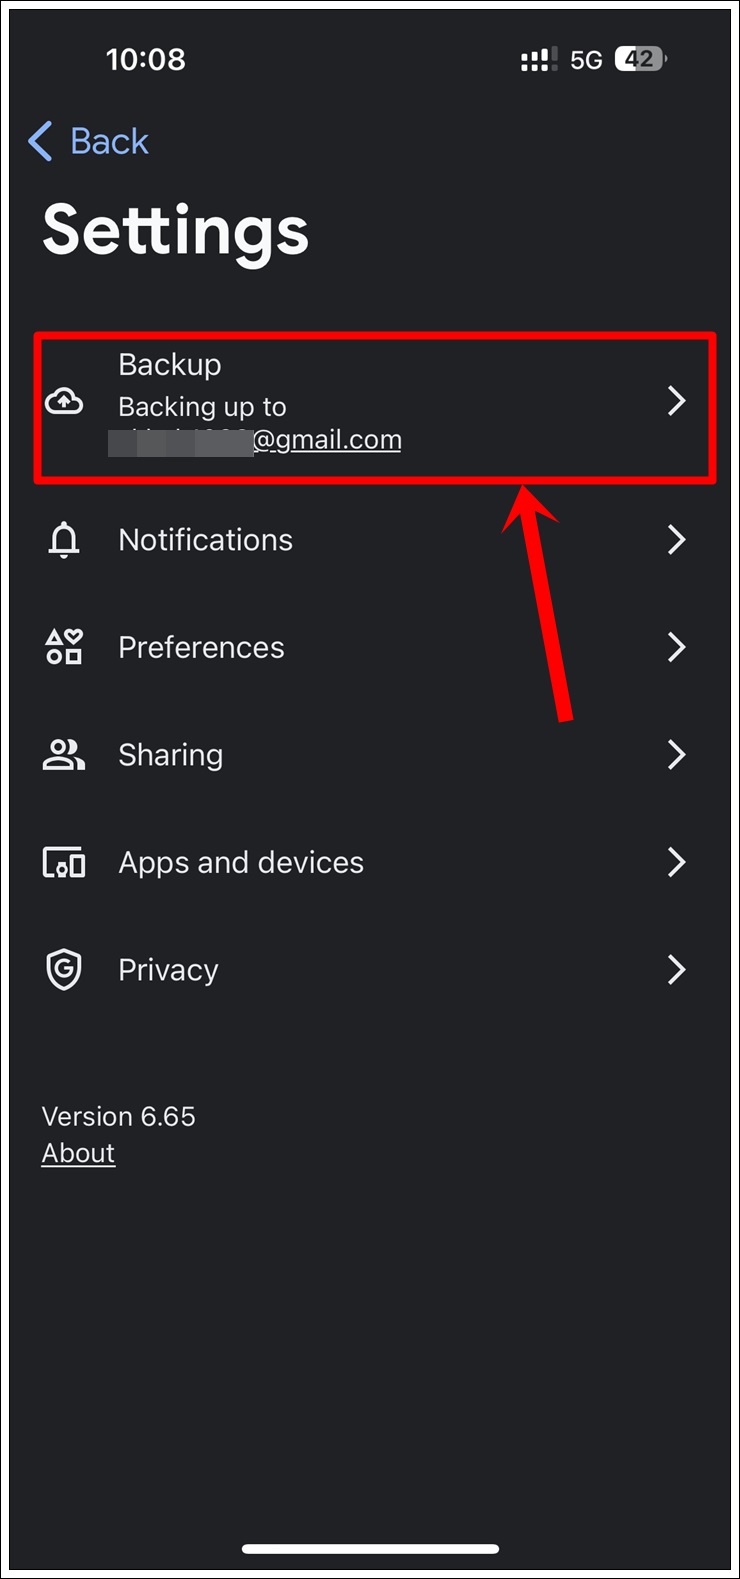
Step 3: Select ‘Backup’
Within Settings, locate and tap on Backup. This is where you control your auto backup settings.
Step 4: Toggle Off ‘Backup’
Switch off the Backup option to cease automatic backups on your Android device.
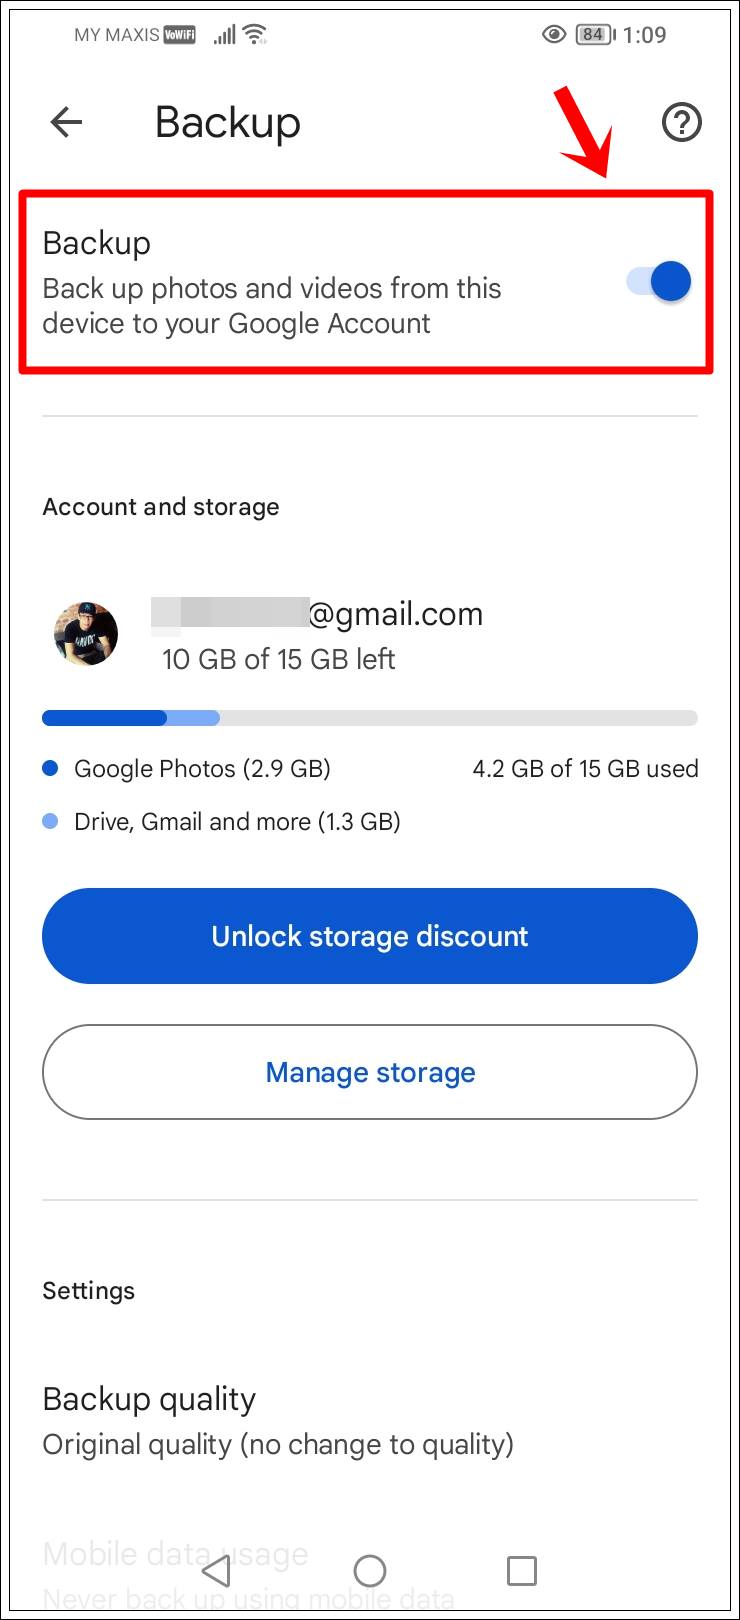 Toggle off ‘Backup’ to disable Google Photos auto backup (For Android)
There you have it. Google Photos auto backup has been disabled on your Android device. All your photos and videos will no longer backup automatically from now on.
Also read: 4 Easy Methods to Do Side by Side Photos on Your Android
Pro Tip: Getting “Google Play Services Keeps Stopping” error? No worries! Explore 11 simple fixes to fix the “Google Play Services Keeps Stopping” annoyance and keep your Android world hassle-free.
How to Stop Google Photos Auto Backup on iOS:
Step 1: Open Google Photos App
Launch the Google Photos app on your iOS device. If not installed, download it from the Apple App Store.
![]()
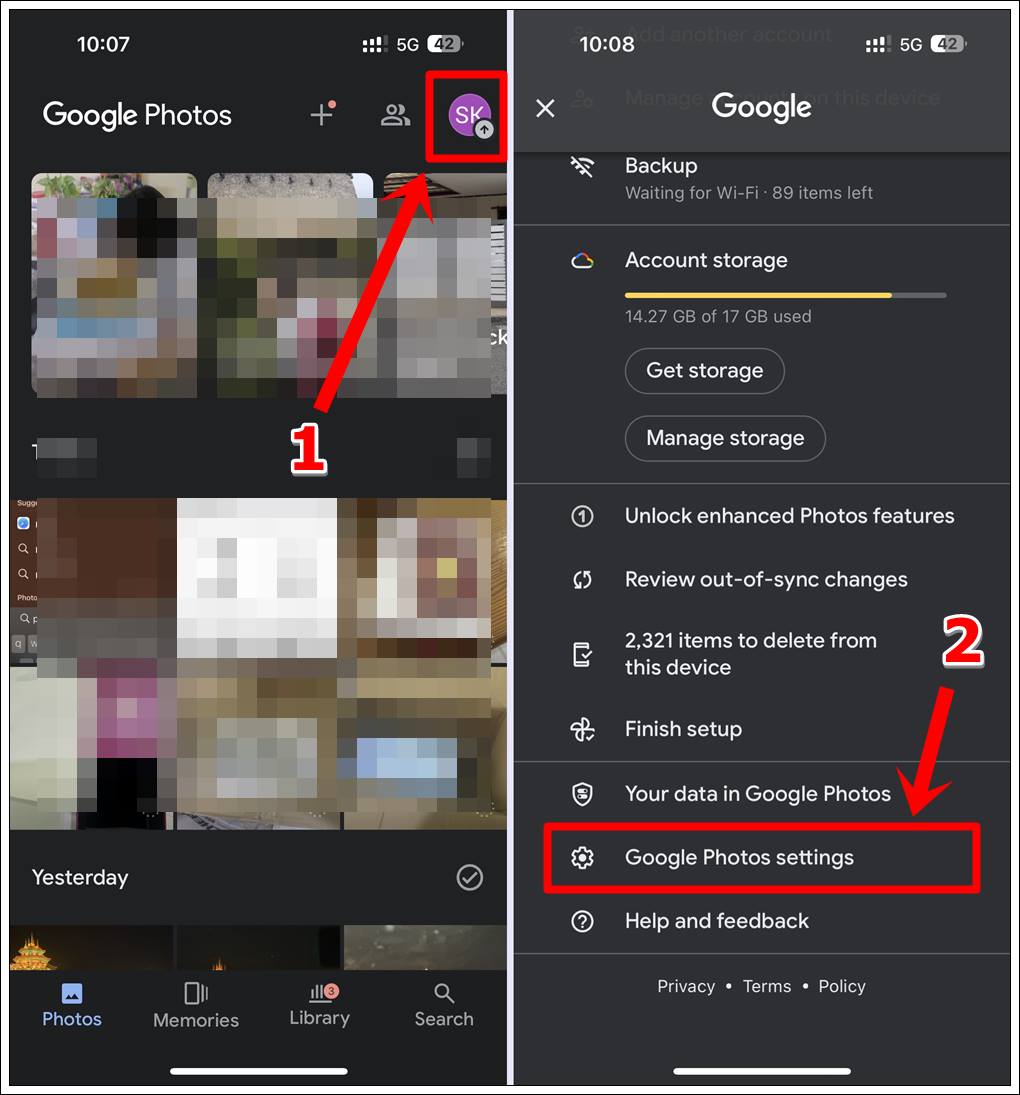
Step 2: Access Settings
Tap your Profile Picture in the top-right corner. Select Google Photos Settings from the menu.
Step 3: Select ‘Backup’
In the Settings, tap on Backup. This is where iOS users control their auto backup preferences.
Step 4: Toggle Off ‘Backup’
Toggle off the Backup option to stop automatic backups on your iOS device.
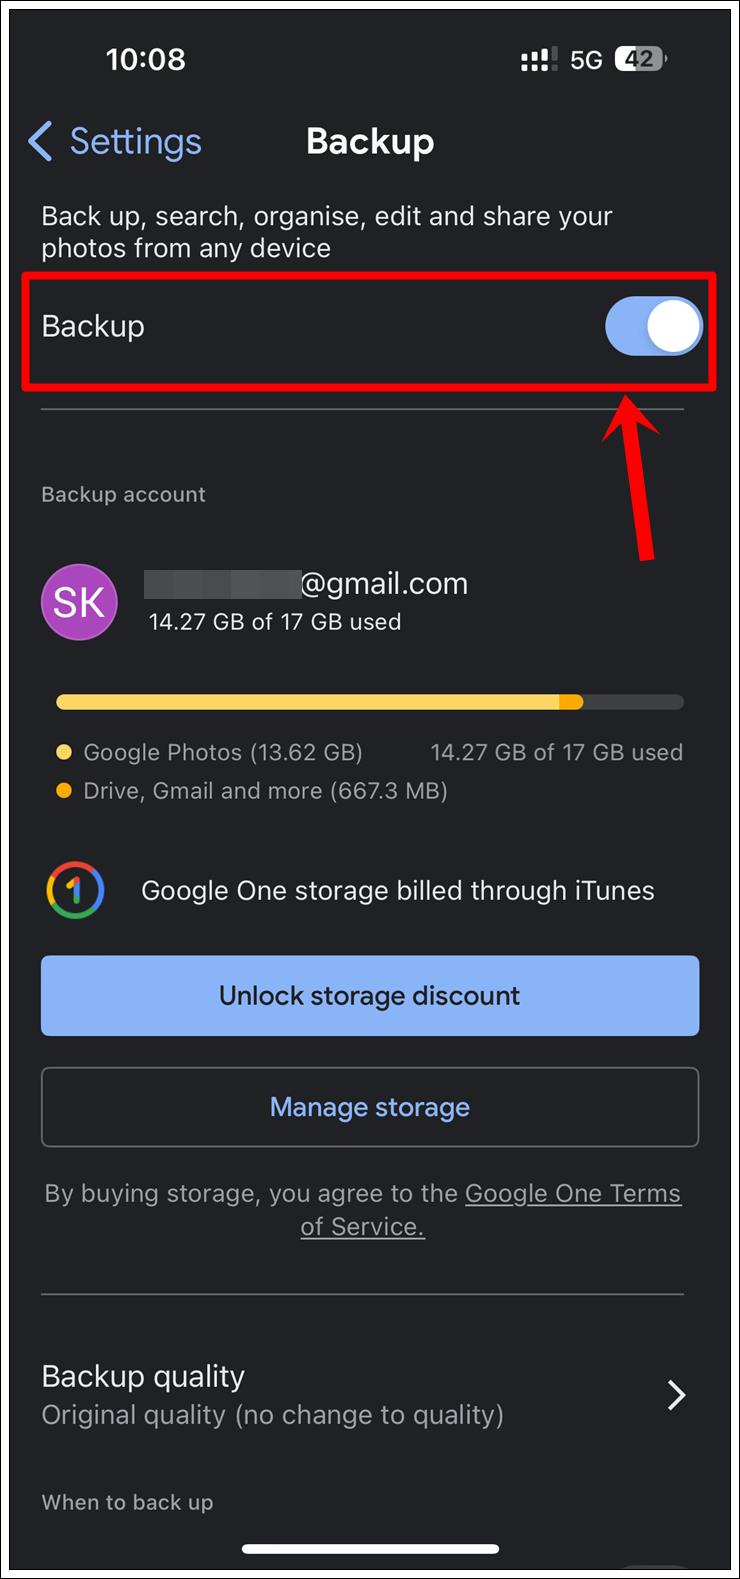 Toggle off ‘Backup’ to disable Google Photos auto backup (For iOS)
Additional Tips for Both Platforms:
- Manual Backup: If you still want to back up specific photos manually, select the photos and use the backup option.
- Free Up Space: Utilize the Free up space (on Android) or Items to Delete from This Device (on iOS) options in Google Photos to remove backed-up photos from your device, freeing up storage.
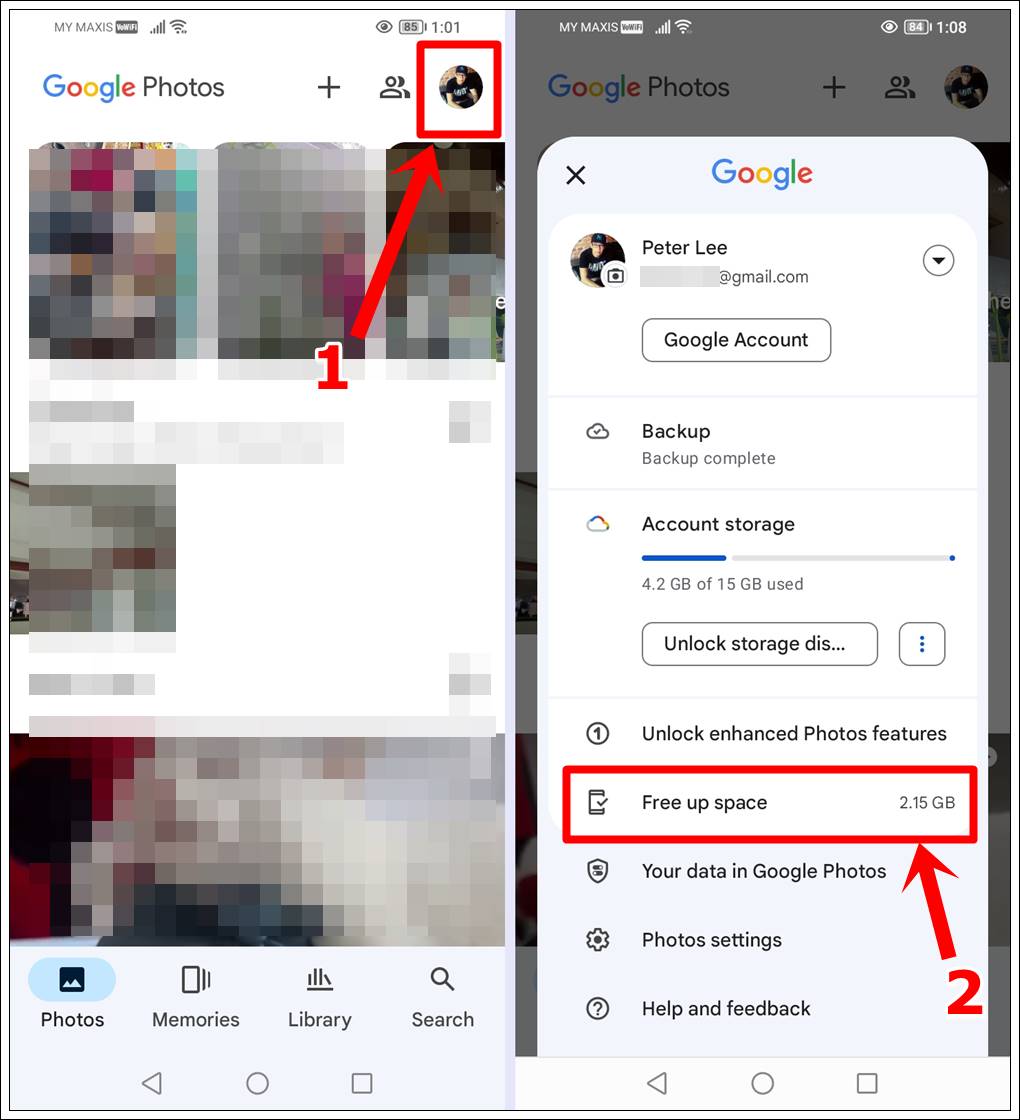 Free up space on your Android device by using the ‘Free Up Space’ option.
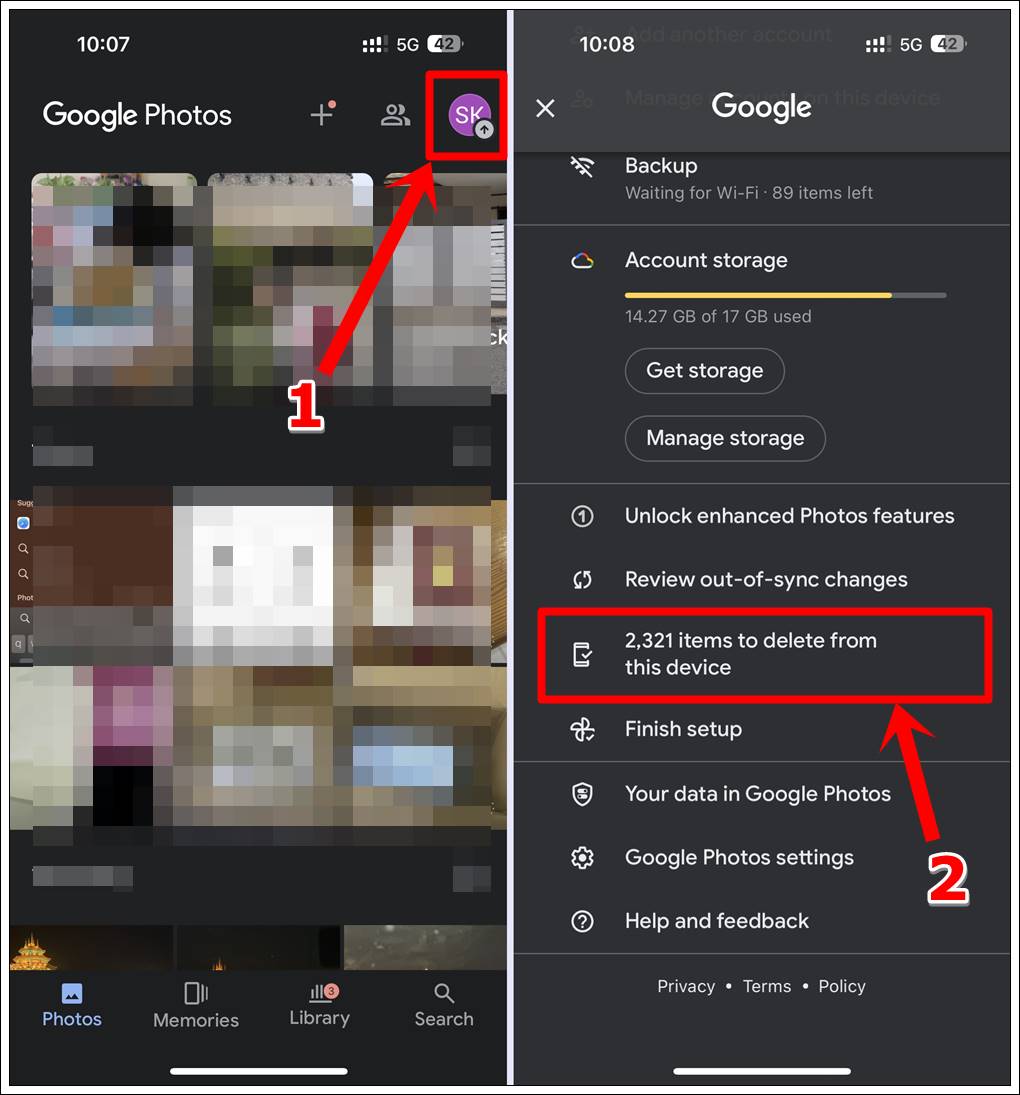 Free up space on your iOS device by using the ‘Items to Delete from This Device’ option.
Frequently Asked Questions (FAQs)
Can I choose specific folders to exclude from auto backup in Google Photos?
Answer: As of now, Google Photos primarily operates on an all-or-nothing basis when it comes to auto backup. It automatically backs up all photos and videos on your device. However, you can manually select which items to delete from your device to free up space.
What happens to my existing backed-up photos when I disable auto backup on Google Photos
Answer: Disabling auto backup doesn’t affect the photos and videos already backed up on Google Photos. They remain stored in the cloud and accessible from any device with the Google Photos app. You can still manually upload new photos or use the ‘Free Up Space on Android’ or ‘Items to Delete from This Device on iOS’ options to manage your device storage.
Can I set a schedule for when Google Photos should perform auto backup?
Answer: Currently, Google Photos doesn’t offer a built-in feature to schedule auto backups. The app automatically backs up your photos and videos when certain conditions are met, such as when your device is connected to Wi-Fi.
Pro Tip: In Google Photos, we keep our memories online. It’s simple to find and organize them. But if we have many photos, it’s tricky to select them all together because there’s no “Select All” button. No worries! This guide teaches you how to pick all your photos in Google Photos on computers and phones.
Final Thoughts
With these easy steps, you can now enjoy Google Photos without the worry of every photo being automatically backed up. Take charge of your storage and keep your digital memories organized just the way you want!