Ever wanted to combine two pictures on your Android? We’ve got you covered! In this guide, we’ll show you four super easy ways to put photos side by side on Android devices. Whether you’re a photo lover or just like to get creative, these steps are a breeze. Let’s get started and make your pictures stand out!
Method 1: Using Android Built-In Feature
Placing two photos side-by-side on your Android phone is a straightforward process. You don’t need to install any third-party apps; the built-in feature has got you covered. Follow the steps below:
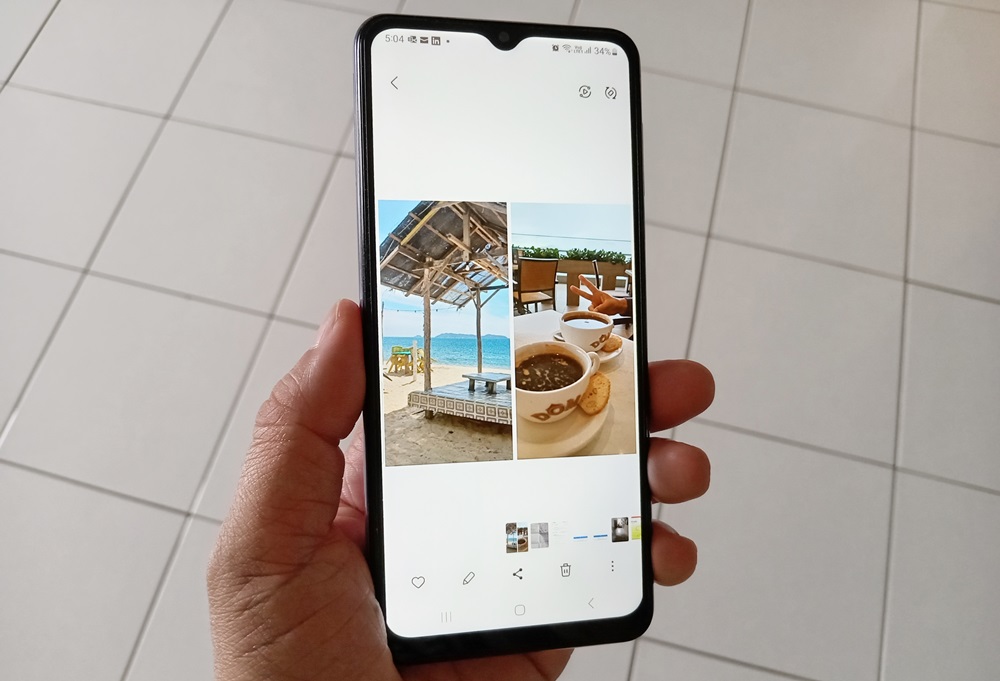
- Open your Gallery.
![]()
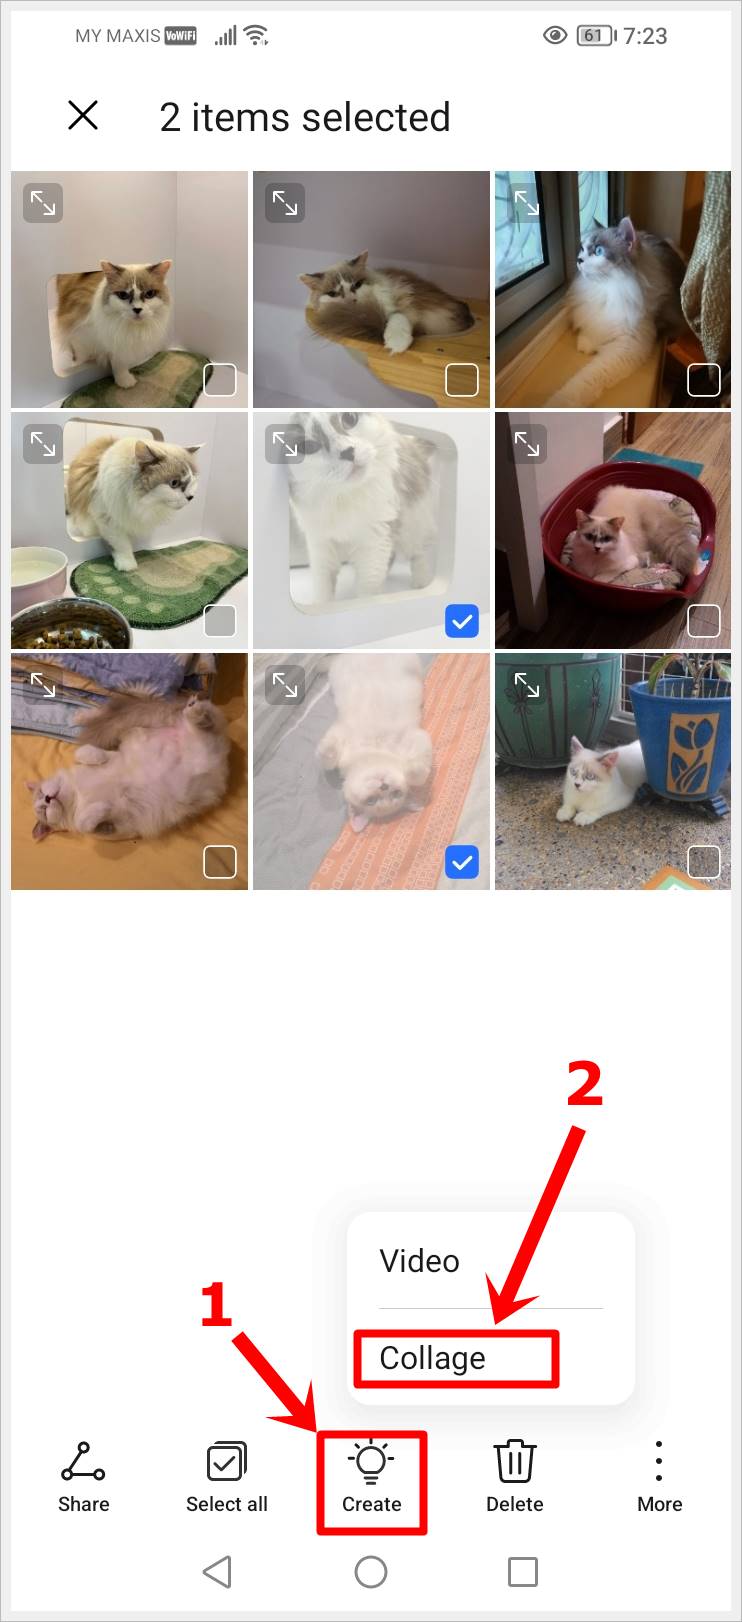
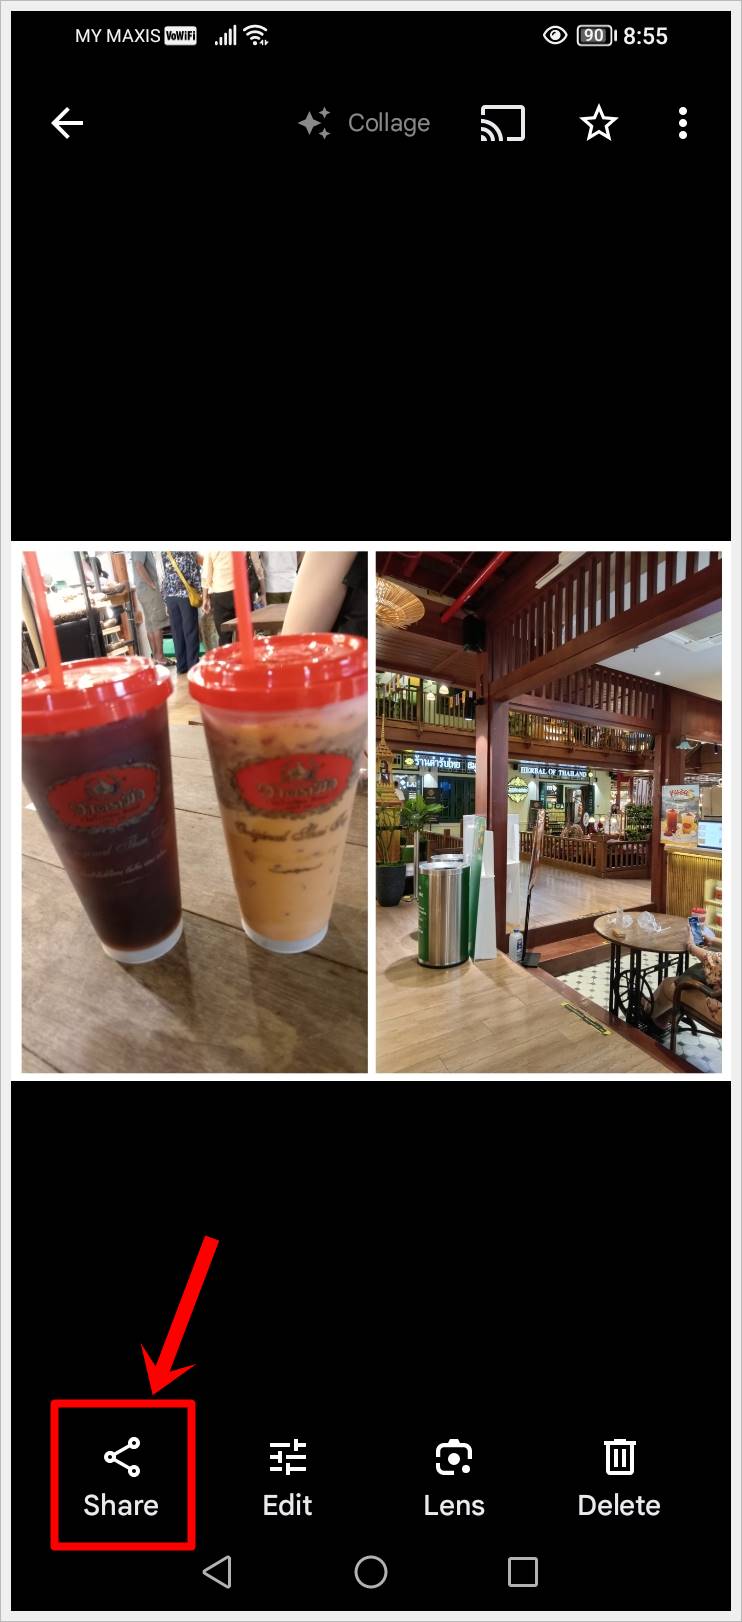
- Choose the two images you want to combine. Press and Hold on each to select.

- Find Create or Collage – tap on it.
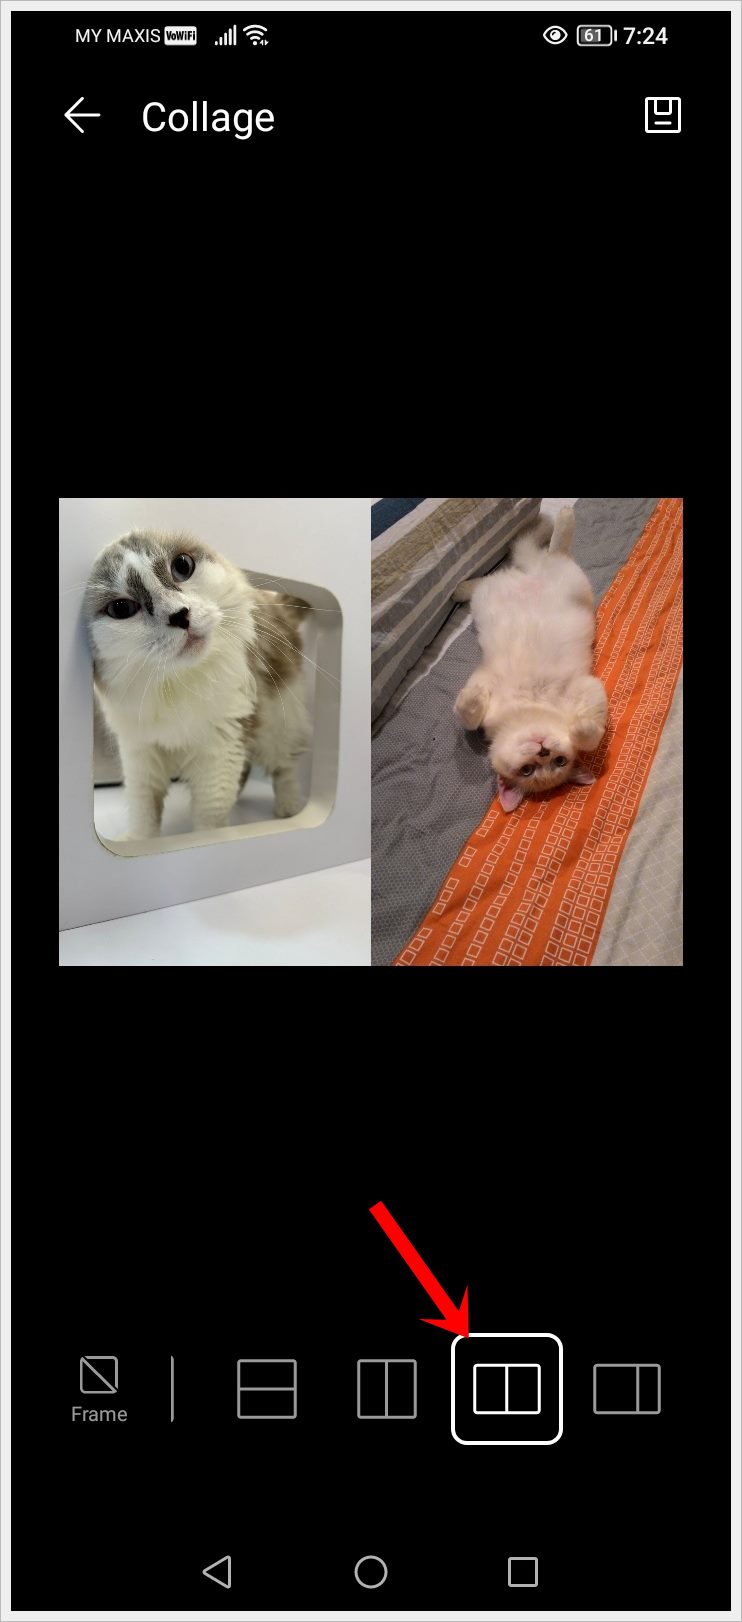
- Explore layout options until you’re satisfied with the side-by-side arrangement.
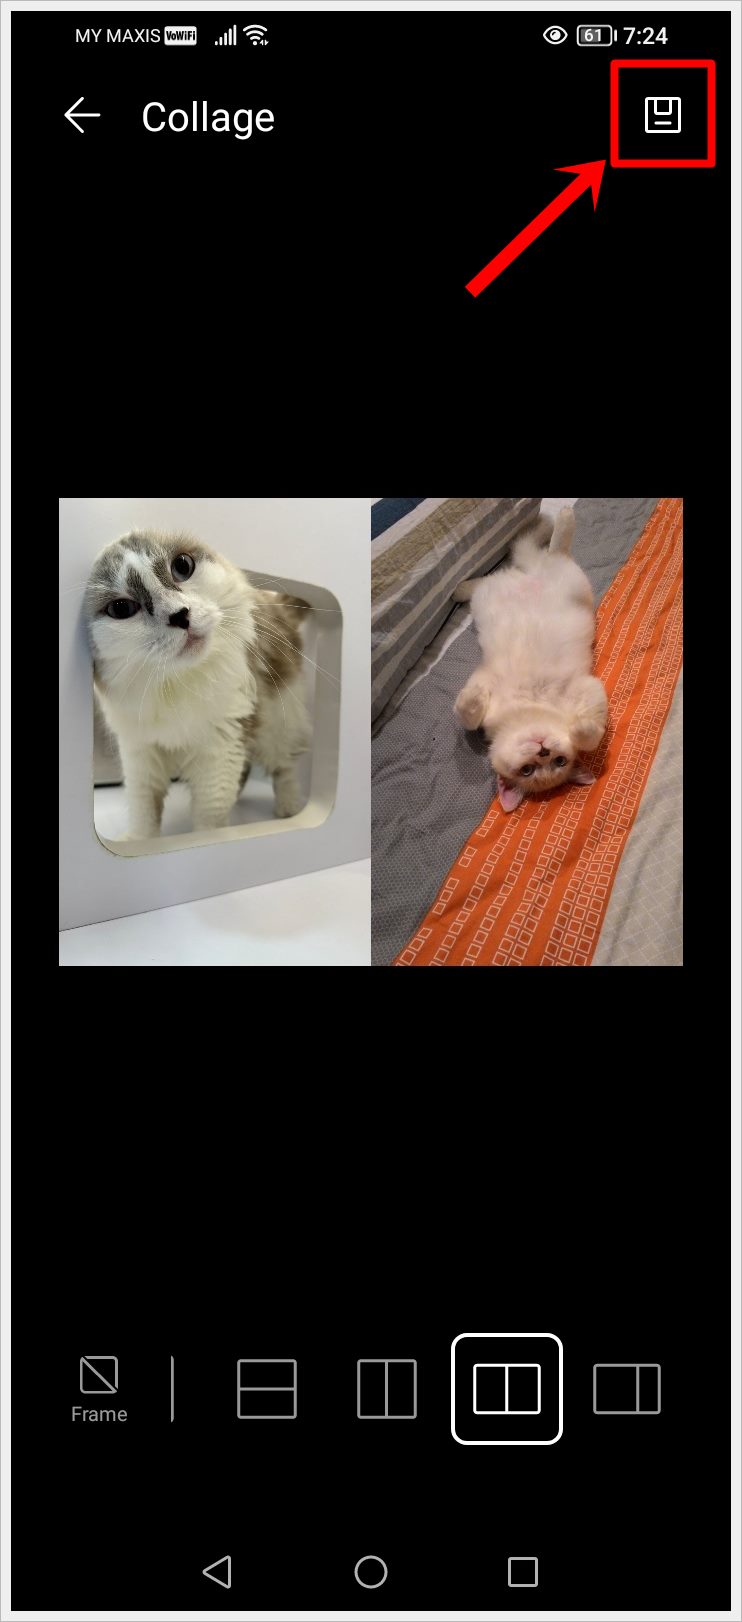
- Save your side-by-side photo.
That’s it! Your Android’s built-in feature makes combining pictures side-by-side a breeze. Try it out and enjoy your seamlessly merged images.
Also read: 10 Quick Tips to Taking Great Mobile Phone Camera Photos
Method 2: Using Google Photos
Google Photos offers a simple yet effective way to place two photos side by side on your Android devices. Ready to dive in? Let’s get started!
- Open your Google Photos app.
![]()
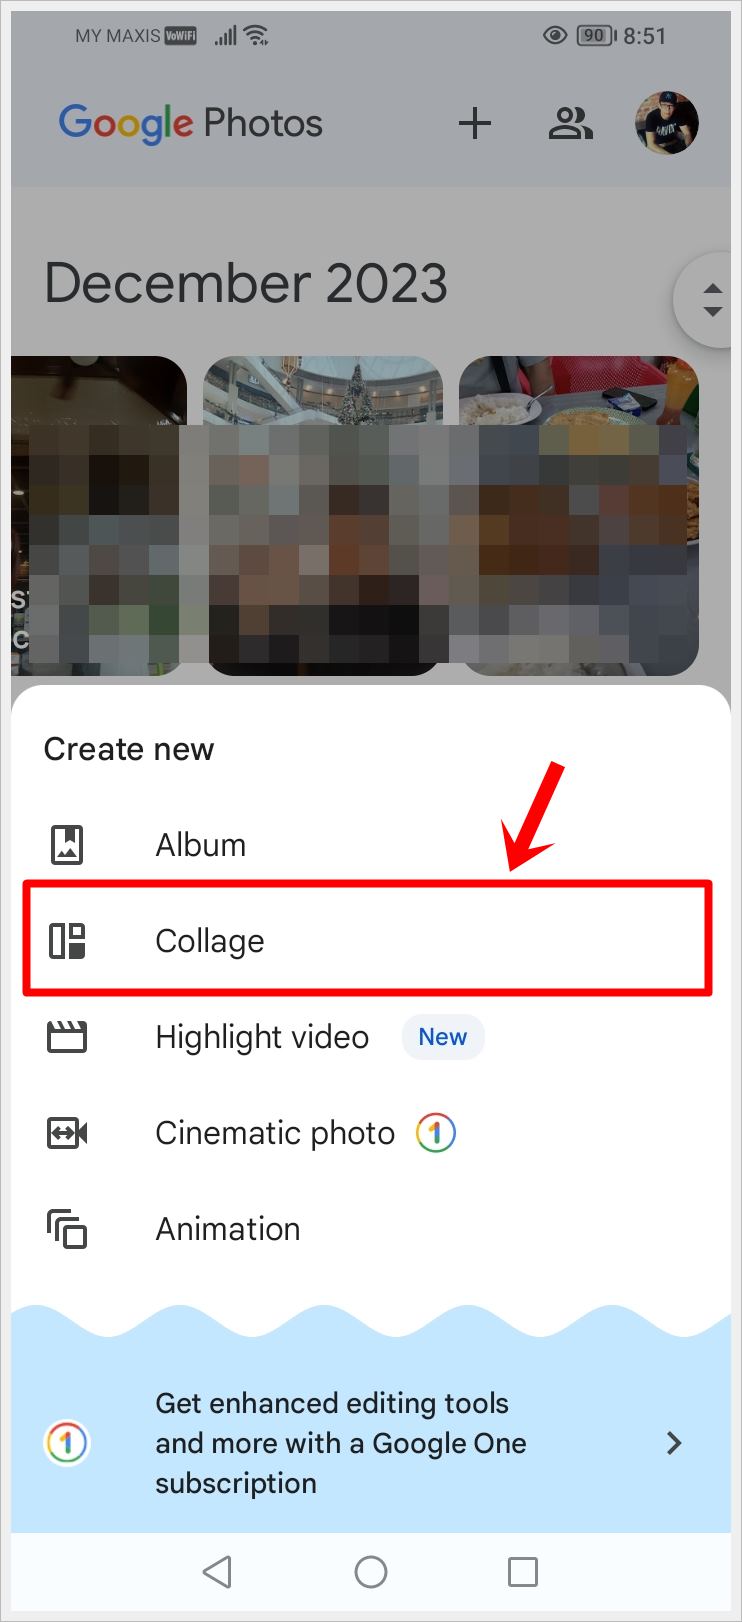
- Tap the + icon.
![]()
- Next, choose Collage or a similar option.
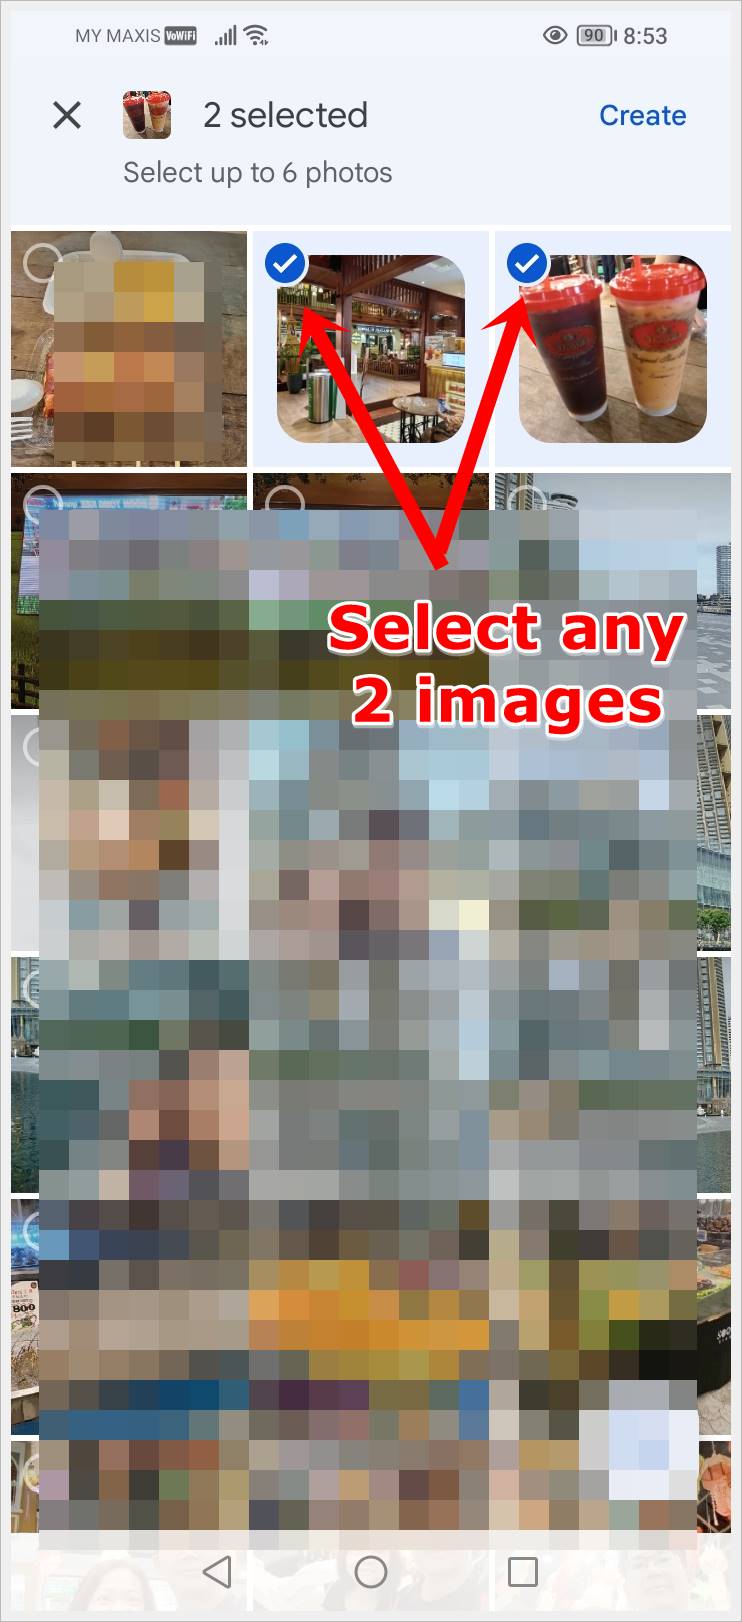
- Select the two images you want to merge.
- Google Photos will automatically arrange a collage. You can tap on it to explore layout options.
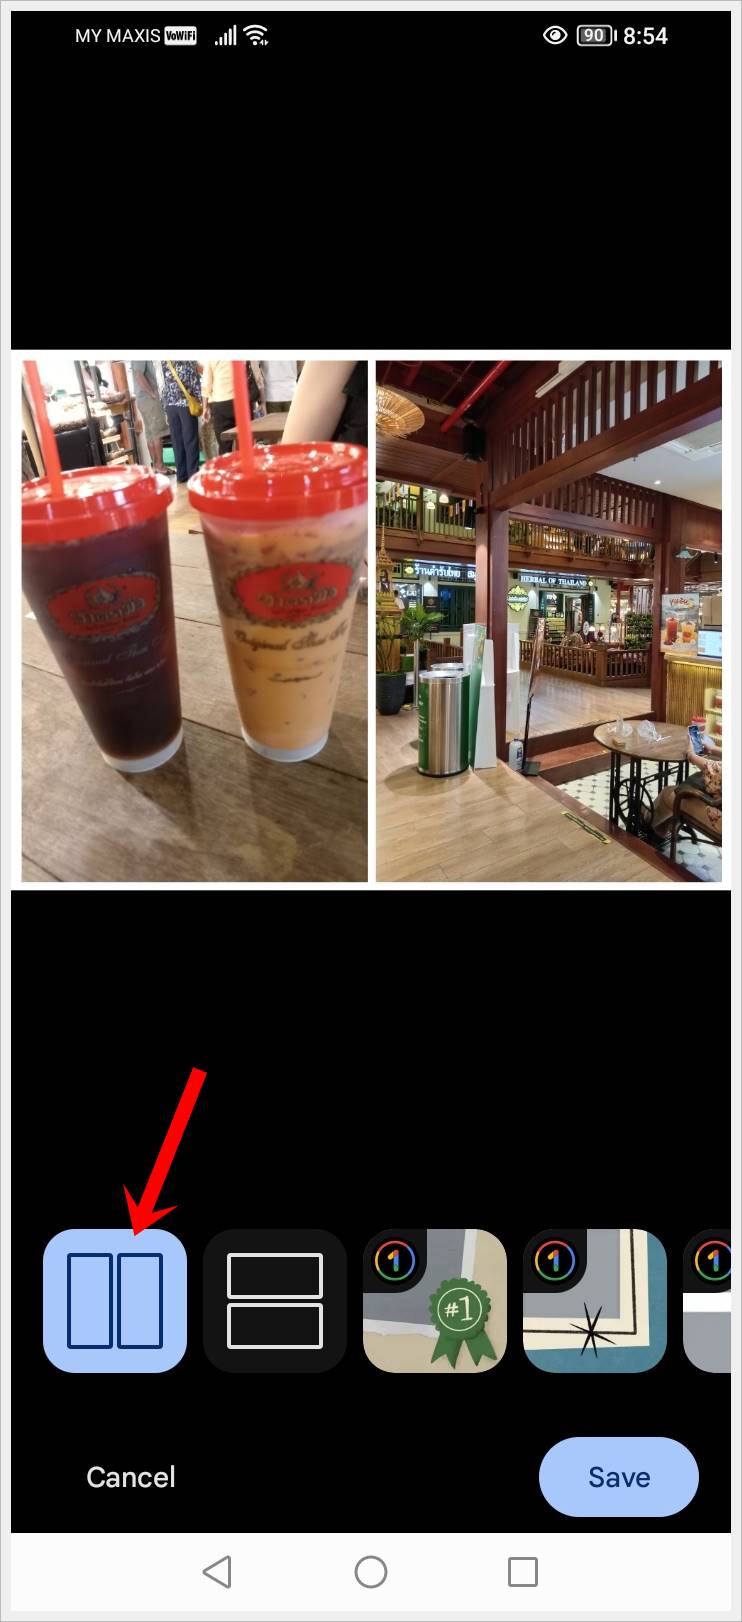
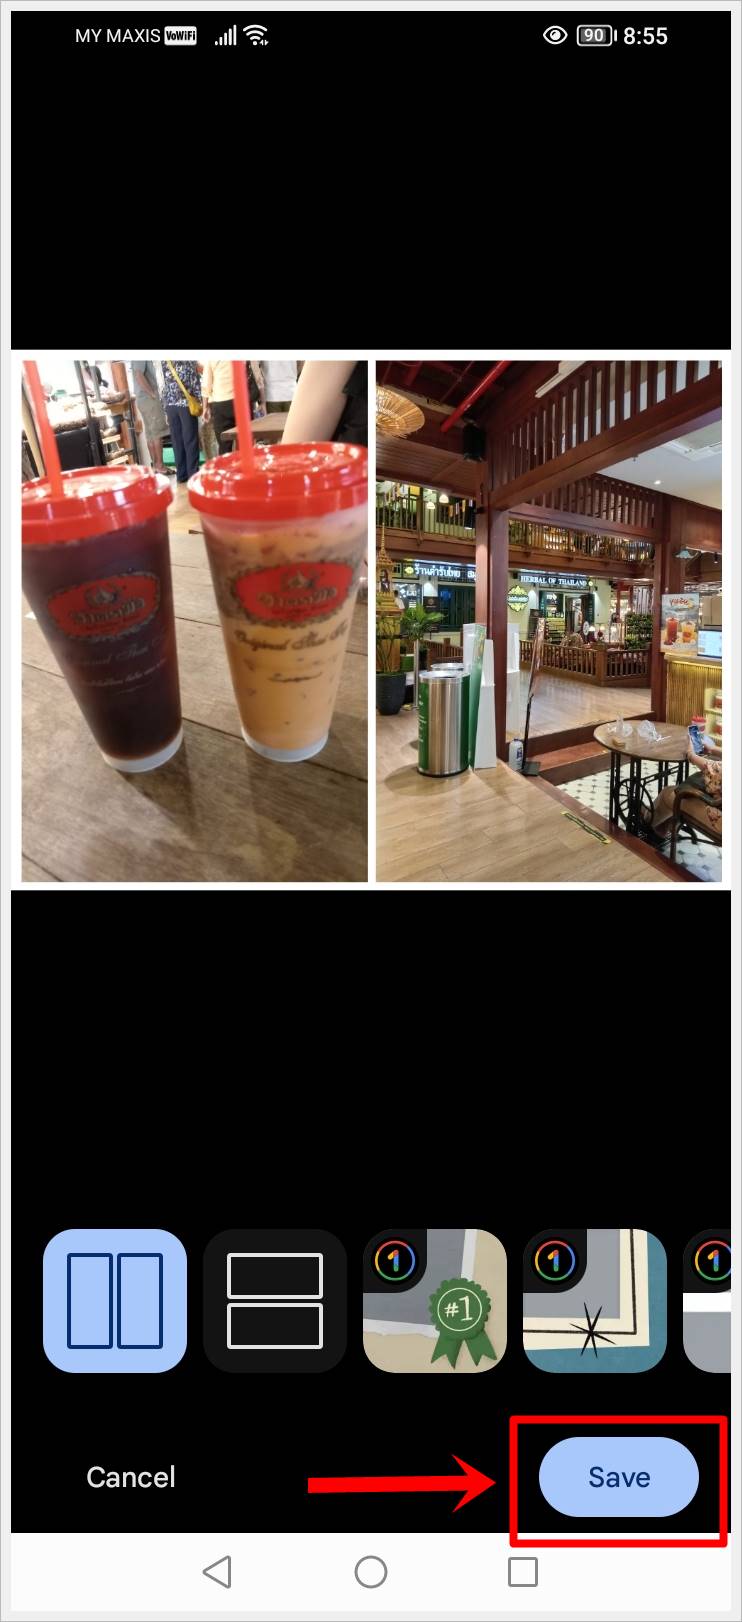
- Once satisfied, tap Save or Done to save your side-by-side image.
- Share it directly from Google Photos if you wish.
That’s it! Google Photos simplifies the process of creating visually appealing side-by-side collages on Android. Give it a try and showcase your creativity effortlessly.
Also read: How to Check the Number of Photos You Have in Google Photos
Pro Tip: Don’t want your photos to be auto backed up by Google Photos? Fret not! Learn how to stop auto backup on Google Photos and take control of your photos backup!
Method 3: Using Instagram
Are you an Instagram user? Well, here’s a cool tidbit – the Instagram app for Android lets you pair two photos side by side using the Story feature. Curious to know how? Let’s dive right into the steps!
- Launch the Instagram app on your Android device.
![]()
- Tap the + icon at the bottom.
![]()
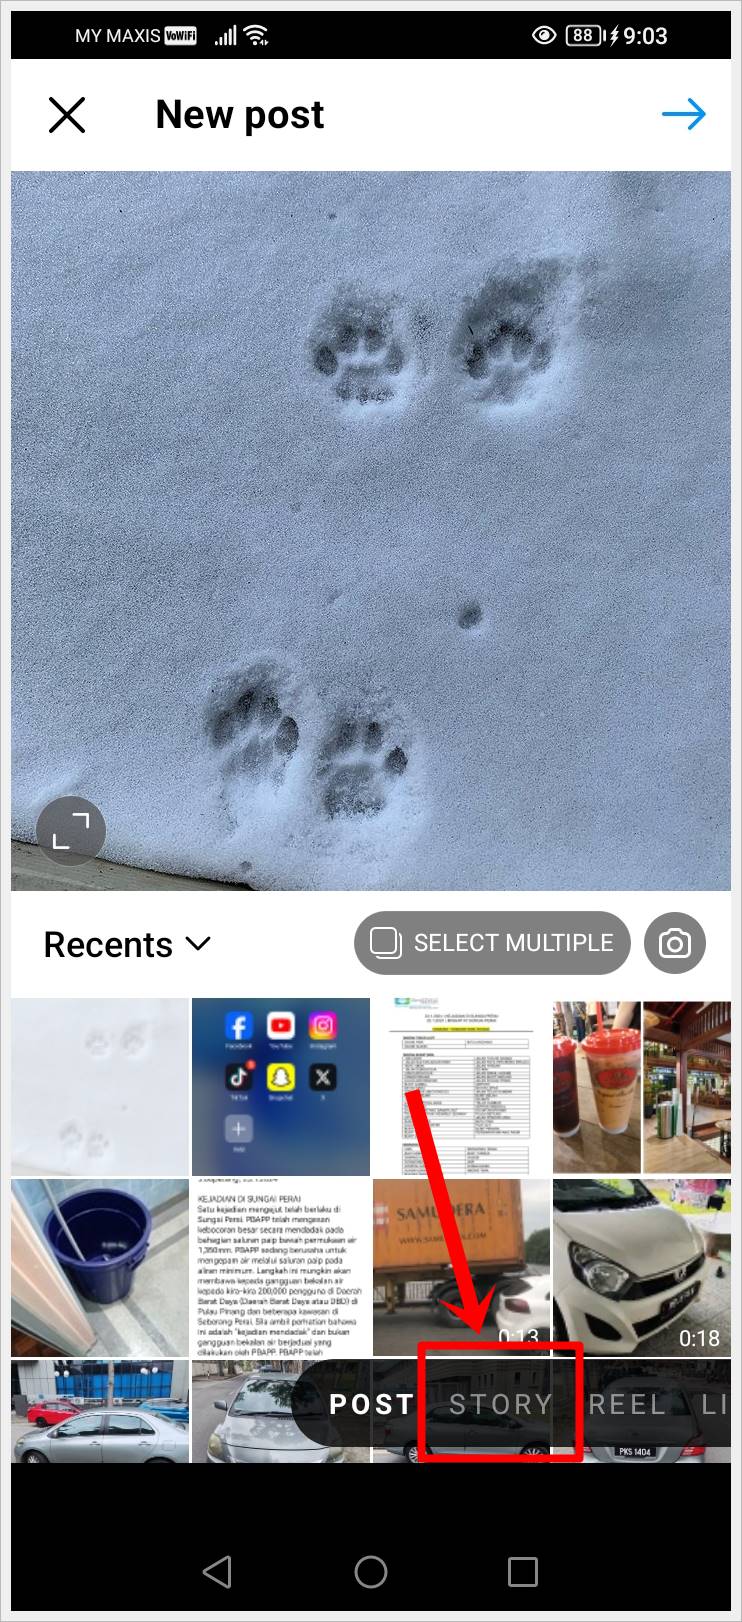
- Look for the Story option on the following page and select it.
- Next, tap on the Layout icon on the left side of the screen to open Collage mode.
![]()
- Tap on the default layout icon for 4 photos and choose the layout for 2 side-by-side photos instead.

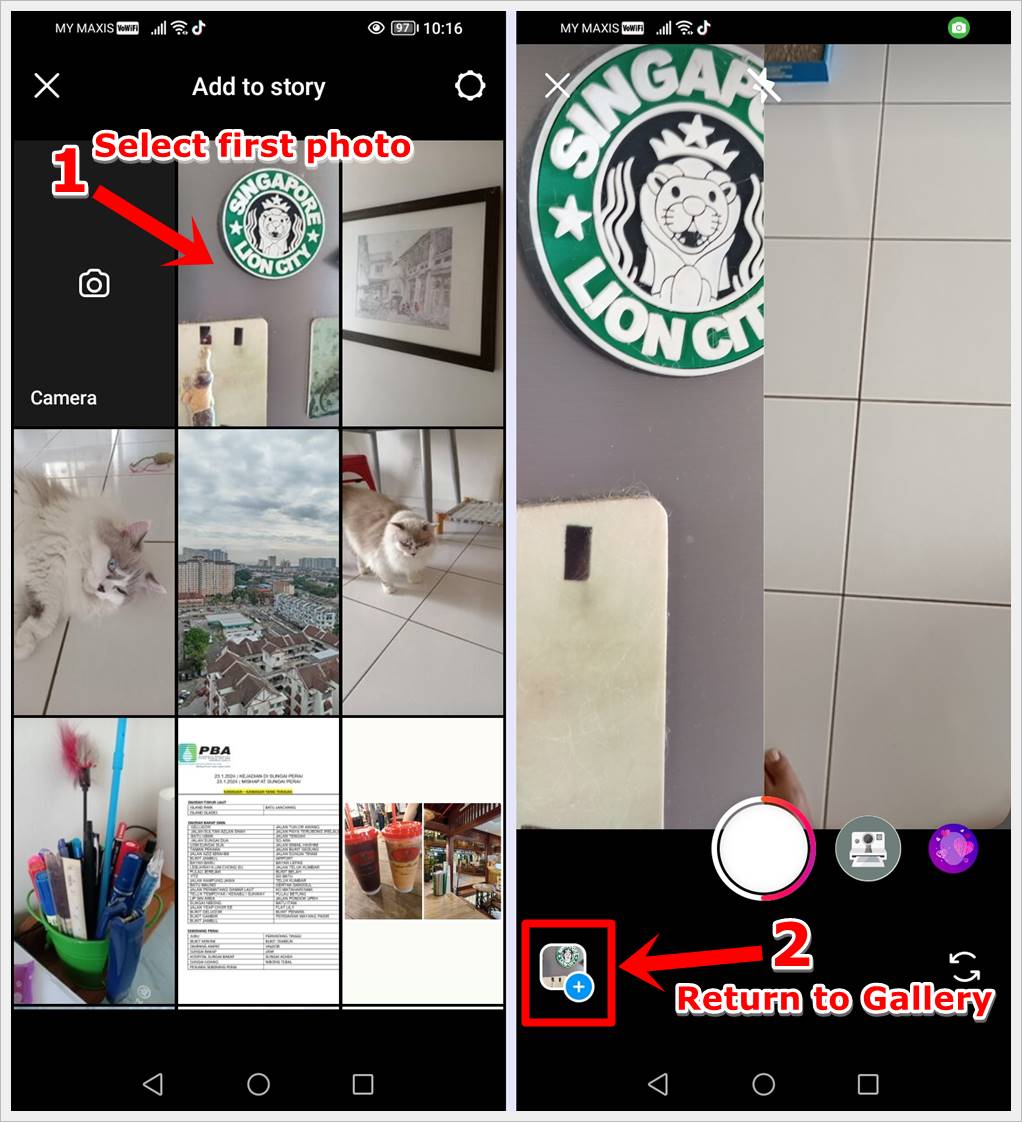
- Now you have chosen the 2 side-by-side layout option, tap the Gallery icon in the bottom-left to access your photos.
![]()
- In Gallery, select the first photo to be placed on the left of the side-by-side layout. Next, tap the Gallery icon again and select the second photo to be placed on the right of the side-by-side layout. After you have selected the two photos, tap the Check button to proceed.
 Select the first photo from the Gallery, and this will be the photo placed on the left side of the layout. Tap the Gallery icon again to return to the Gallery and select the second photo.
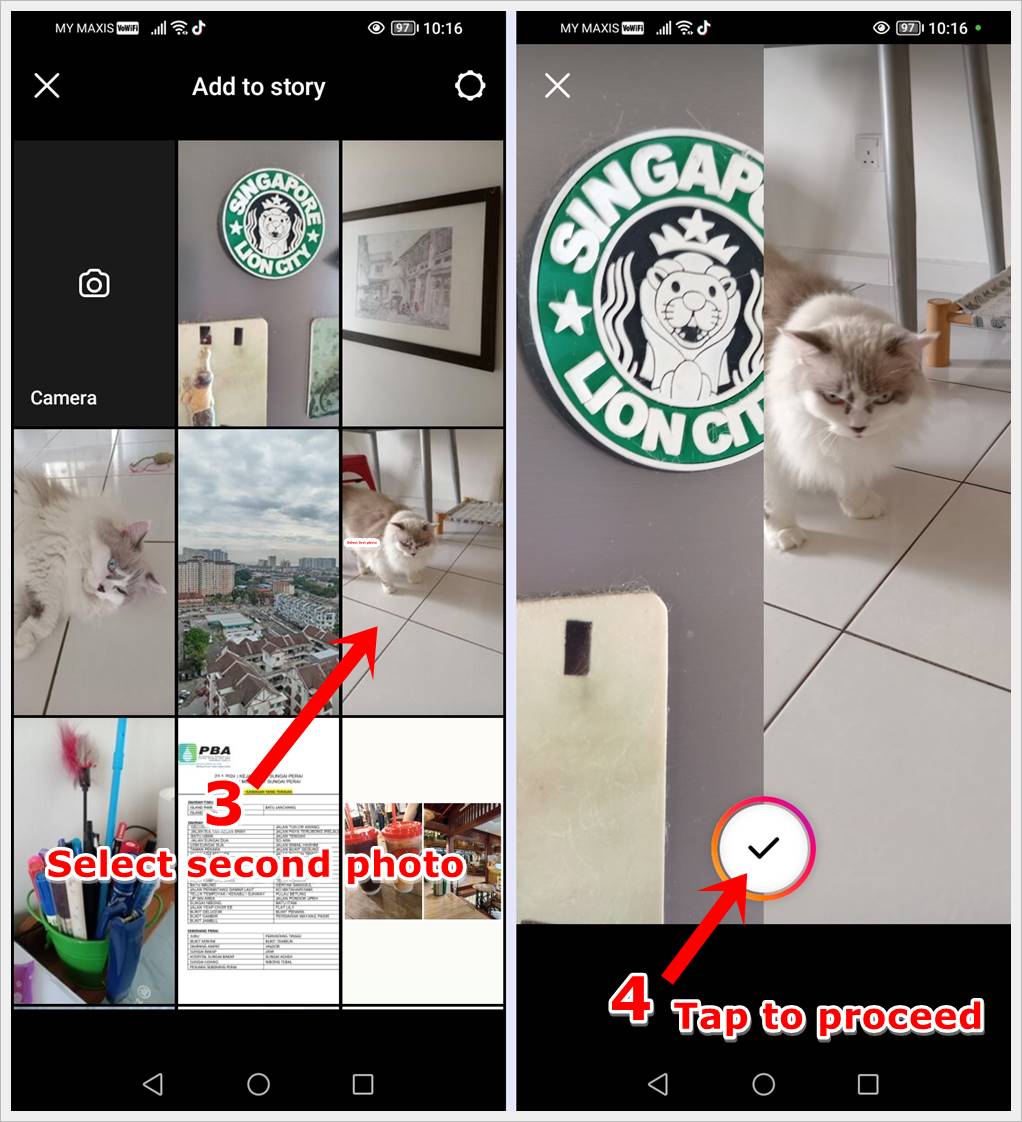 Select the second photo from the Gallery, and this will be the photo placed on the right side of the layout. Tap the Check button to proceed to the next step.
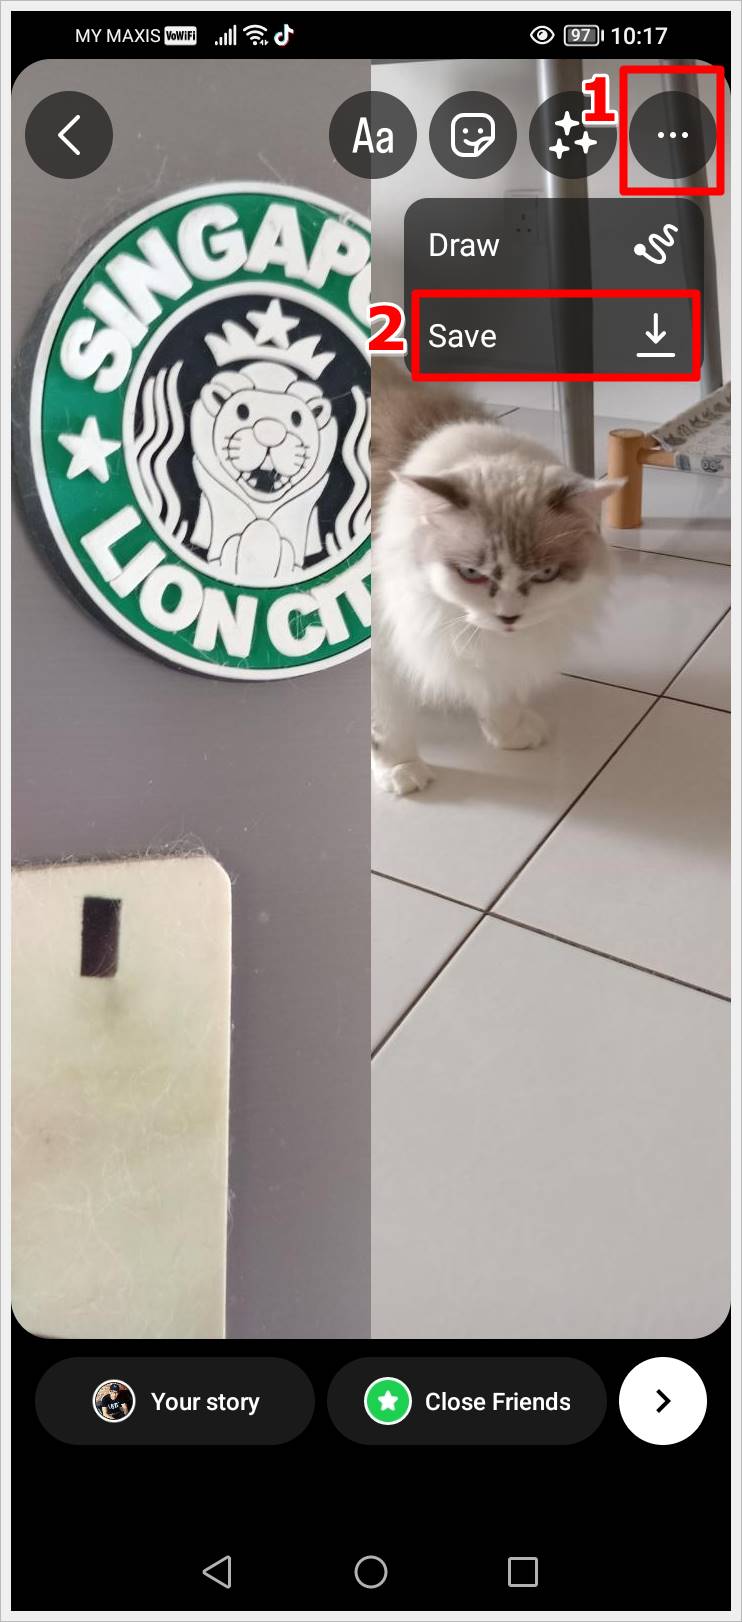
- Finally, download and save your side-by-side photo by tapping the Three-Horizontal-Dot Icon, followed by the Save Icon.
That’s all! Instagram offers a simple yet effective way to merge two images side-by-side on Android. Give it a try!
Pro Tip: There are numerous symbols and icons on Instagram. To help you navigate easily, check out our comprehensive guide on what all the symbols and icons mean on Instagram.
Method 4: Using Samsung Gallery
Got a Samsung Galaxy phone? Good news! Your native Gallery app makes it easy to place two photos side by side. Ready to dive into the steps? Let’s get started!
- Open the Samsung Gallery app on your Samsung Galaxy phone.
![]()
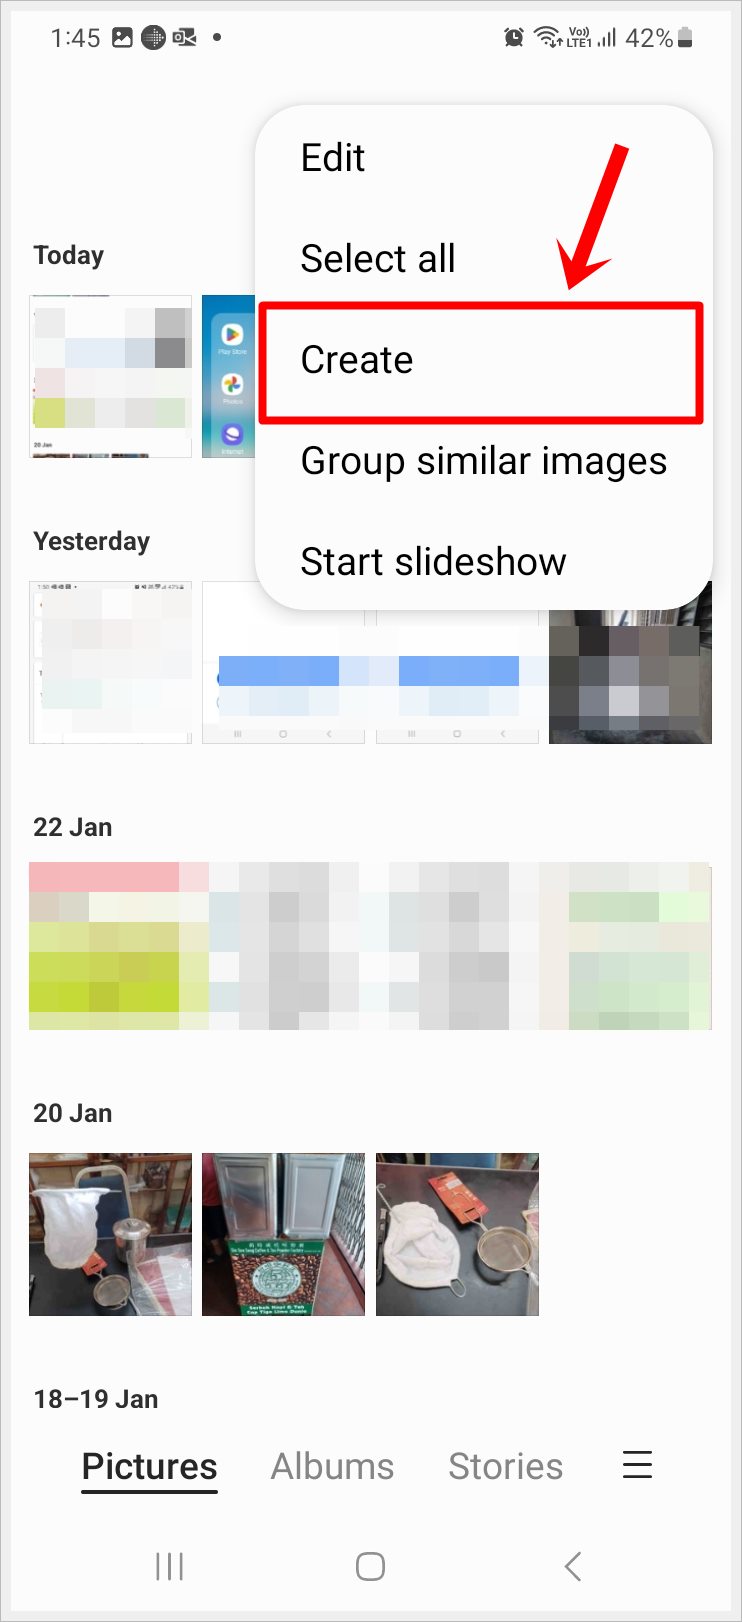
- In Gallery, tap the 3-Vertical-Dots Icon in the top-right.
![]()
- Next, select and tap on Create.
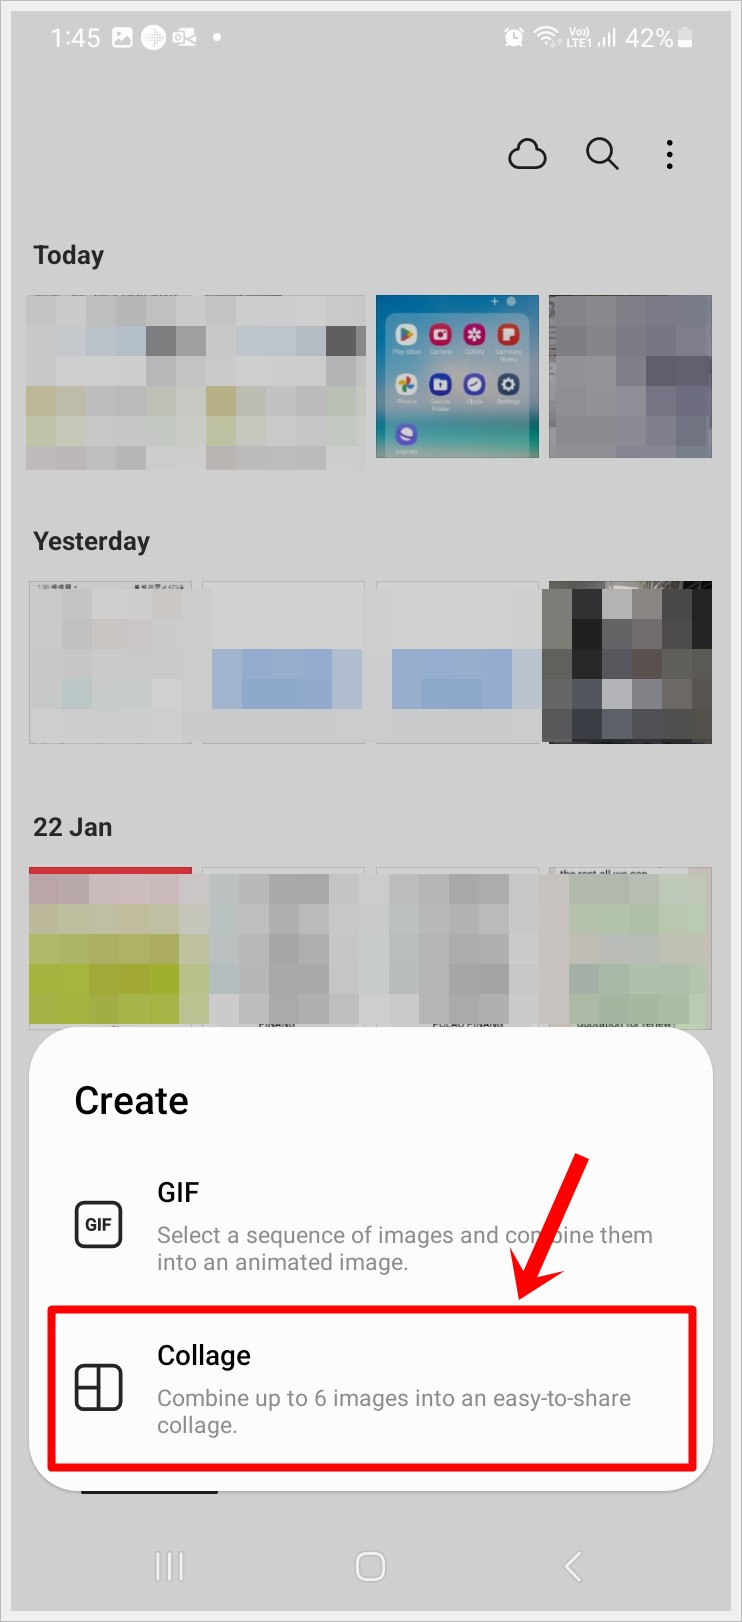
- In Create, tap on Collage.
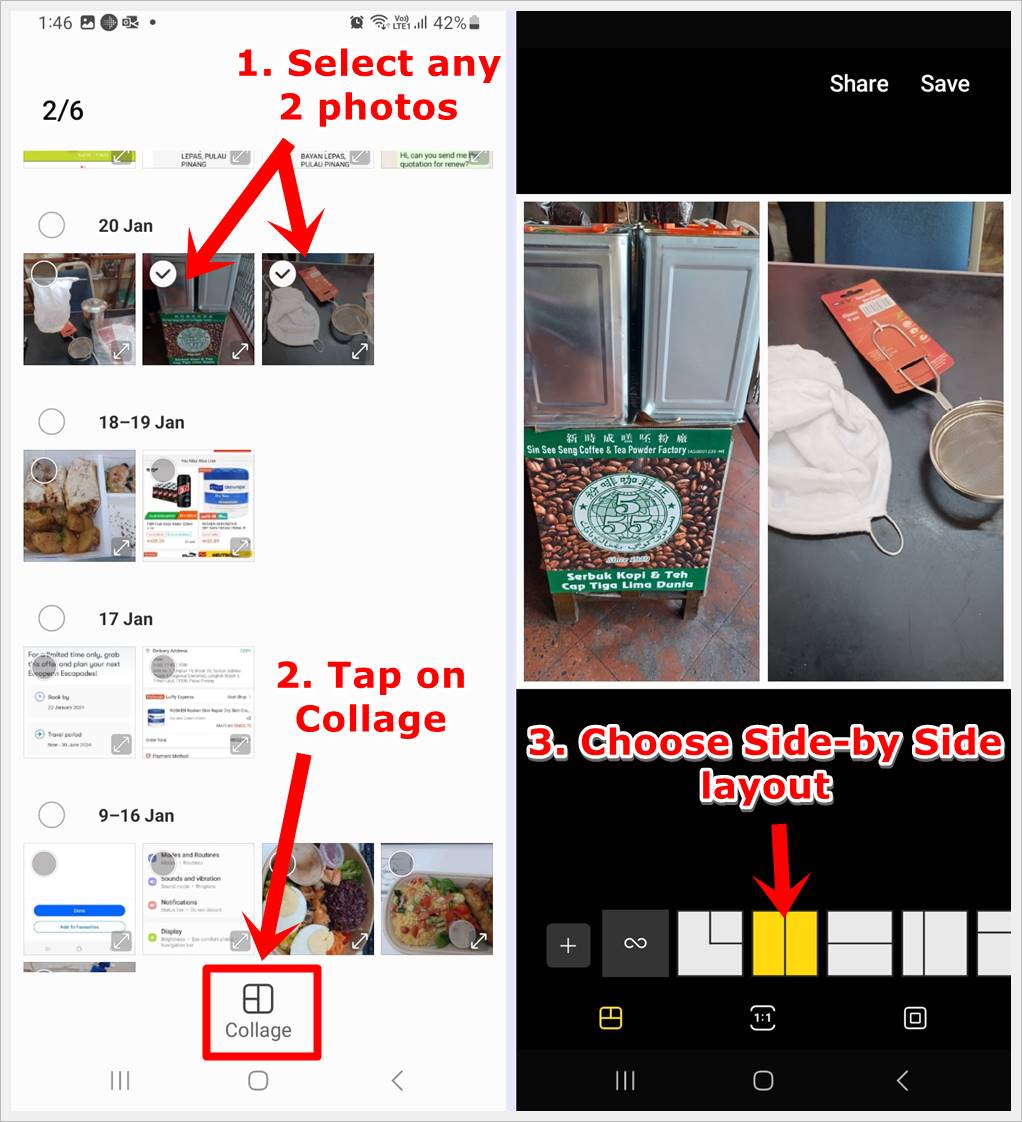
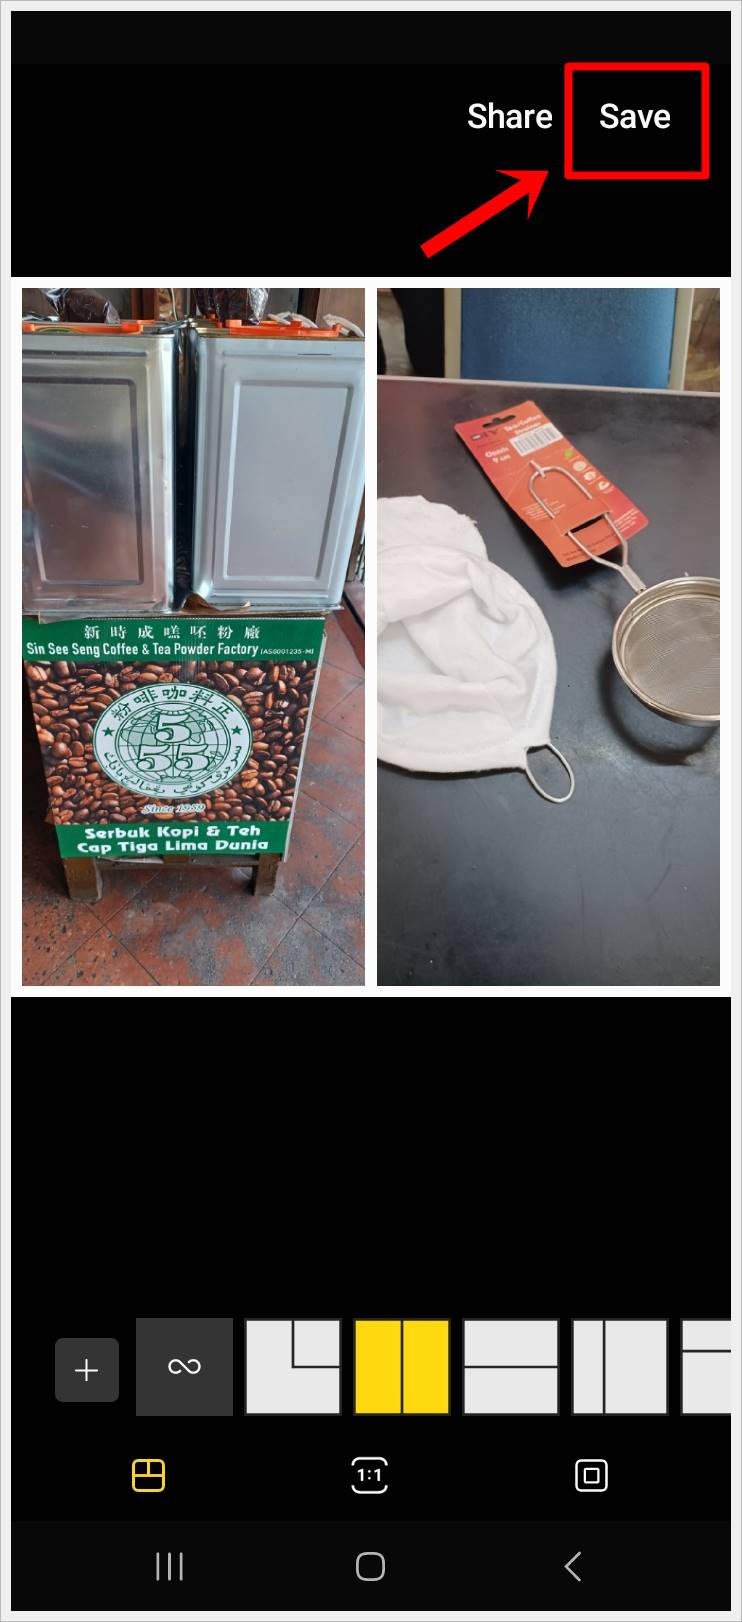
- Select any 2 photos you would like to do side-by-side and tap on the Collage Icon at the bottom. Choose the correct side-by-side layout from the layout options at the bottom on the following screen.
- Finally, tap the Save button in the top-right to download your merged side-by-side image.
That’s it! Samsung Gallery provides a user-friendly platform for effortlessly merging 2 images side-by-side on your Samsung Galaxy phone. Explore the features and enhance your photo collection with seamless compositions.
Pro Tip: Is your Samsung Galaxy phone constantly freezing? Discover 10 fixes for a Samsung Galaxy phone that keeps freezing and get your phone back to its optimal performance.
Conclusion
And there you have it – four simple ways to merge two photos into beautiful side-by-side compositions on your Android. Whether you use the built-in features or apps like Google Photos, Instagram, or Samsung Gallery, your creative potential is at your fingertips.
Now, it’s your turn to play around and see what works best for you. Don’t hesitate to experiment with different layouts and styles. Your Android is your canvas – let your creativity shine!