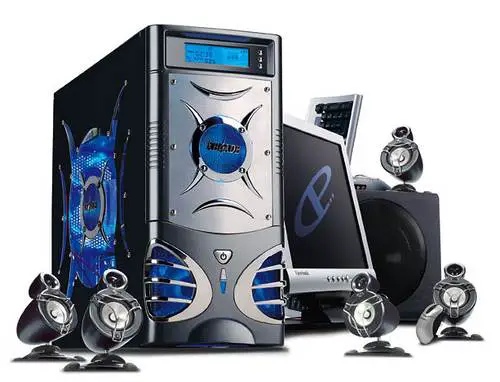
 Building your own computer is a rewarding process and it definitely has a lot of benefits. Not only is it more cost effective than buying a pre-built computer, but it also gives you complete control over the quality of your system. However, building a computer is no light task. There are risks involved and it’s important that you take your time to learn as much about building a computer as possible before you start.
In this article I’m going to go over seven tips that first-time builders need to know before they build their own gaming computer.
Tip #1 – Save A Little Longer
For an entry-level system I recommend spending no less than $500. However, one of the biggest mistakes I see first-time builders make is that they rush into getting their components as soon as they have the bare minimum amount of cash to spend. Instead of going out and purchasing an entry-level set of components as soon as you get enough cash, why not wait until you have a couple hundred more to spend, so that you can get a gaming computer that will play pretty much any modern game on the highest settings?
While $500 worth of components will give you moderate results and will have you playing pretty much any game, $700 worth of components will get you a set of components that will allow you to max any game out and your system will be able to perform at a higher level for a longer time. So, one way to easily get to build a better gaming computer is simply to be more patient. That patience will pay off over the long run.
[Read also: Technology – The Waiting Game vs The Impulse Buy]
Tip #2 – Get the Best Video Card Possible While Maintaining Quality in Your Other Components
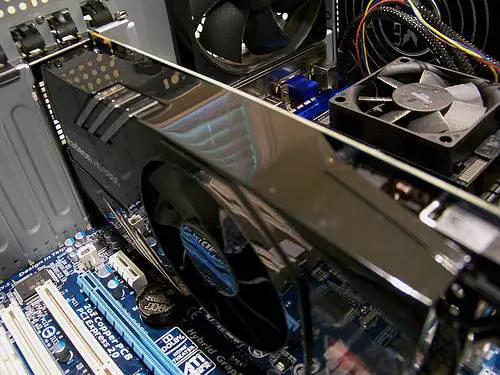 When it comes to in-game performance, no component is going to have a bigger impact than your video card. Therefore, it’s important to get the best video card possible for the budget you have laid out.
However, you don’t want to spend so much on your video card that you have to sacrifice the performance of other components in your build.
As a good rule of thumb, it’s best to spend anywhere from 20-30% of your total budget on your video card. So, if you have a $500 budget for your gaming computer, you should spend roughly $100-$150 on your video card.
Tip #3 – Don’t Skimp on Your Power Supply and Motherboard
Another huge mistake that first-time builders make is that they choose the cheapest power supplies and motherboards they can find. This is a huge mistake.
Your motherboard and power supply will play incredibly important roles in the overall quality of your system. A bad power supply can actually end up damaging other components in your system and a low-quality motherboard can cause a ton of issues as well.
Perhaps the biggest reason why first-time builders mess up on their power supply is because they think that a higher wattage rating equals a better power supply. So, when they see the Kentek’s of the world offer a 850W PSU for under $30, they think they’re getting a steal of a deal, when in reality, they’re buying a piece of junk that has been falsely labeled with a high wattage rating so that they can sell it.
So, in order to avoid a ton of complications with your build, it’s important that you do your homework when choosing your motherboard and power supply. To help you choose a quality motherboard and PSU, use these three guidelines:
- Buy a motherboard/PSU that has good customer reviews
- Buy a motherboard/PSU that has good expert reviews
- Buy a motherboard/PSU that is built by a reputable manufacturer
By using these three guidelines in unison, you can’t go wrong.
[Read also: The PC Won’t Turn On: Basic Troubleshooting for Power Loss]
Tip #4 – Don’t Be the First to Try Out a New Manufacturer
As mentioned above, it’s best to buy from a reputable manufacturer. A lot of first-time builders will choose components manufactured by little-known companies. And, while those companies might be the next best thing, when it comes to your gaming computer, you shouldn’t take any chances.
Instead, let someone else choose components made by those companies and let them find out whether or not their components are worth it. You, on the other hand, should buy from well-known and trusted manufacturers. That way you know that you’re getting a quality product and, if something does go wrong with it, you know that you’re backed by a trusted company that has been around for a long time. In addition, they will also have the knowledge to answer your questions and queries on tape and reel vs cut tape for example and advise you on the best products for your needs.
[Recommended read: The Importance of Buying Manufacturer Original Laptop Chargers]
Tip #5 – Use a Clear, Wide-Open, and Well-Lit Space for Your Build
There are so many screws, cables, and components that go into a computer that it can be easy to lose something during the building process. Therefore, it’s always a good idea to set aside a large space for you to build your computer. That way you’ll be able to keep everything organized and you won’t be cramped up.
Also, you should make sure that you have good lighting. It can be pretty tough to see in the corners of computer cases and without good lighting you won’t have a clue as to what you’re doing. So, make sure that your building area is well-lit. And, it’s always a good idea to have a mini flashlight to help you see into your case.
Tip #6 – Don’t Forget the Thermal Paste!
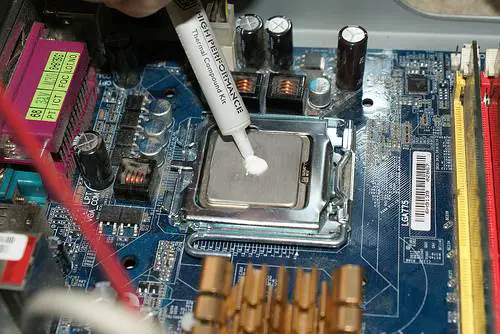 Thermal paste is a conductive material that is applied between the back of the CPU and the bottom of the heatsink/CPU fan. Basically, what the thermal paste does is conduct the heat from the processor into the heatsink/CPU fan, which then exhausts the heat away from the processor.
Without thermal paste, your heatsink/CPU fan will not be able to disperse heat from the processor in an effective manner and, as a result, your processor will reach extreme temperatures. Therefore, it’s incredibly important that you get a tube of thermal paste (which is usually around $5-$10) along with your components when you’re ready to buy the parts for your system.
Applying thermal paste can be tricky, as it’s extremely sticky. It’s important that you don’t get the thermal paste on your motherboard, or on the pin-side of your processor.
There are many different strategies for applying thermal paste. You want to make sure that you have a very thin layer of paste spread out to cover the majority of the back of the processor. However, you don’t want to put so much that it seeps out over the edges. In the end, the most important thing to remember when applying thermal paste is to go slow and take your time.
Tip #7 – Make Sure You Have another Computer/Laptop With Internet Access
With all of the computer-building guides, forums, and videos on the internet, one of the most important things to have available to you during your build is another computer with internet access.
With another computer that has internet access, you literally have hundreds of thousands of people supporting you with your build. If you run into trouble, a well-crafted Google search can yield you multiple solutions to your problem. And, typically, if you do have any problems with your build, it’s highly likely that someone else has had the same problem solved in an online forum.
I can personally attest to the benefits of having a computer with internet access while building, because it has saved me with a number of problems I have ran into during the building process. And, ultimately, the internet is a big reason why the building process is becoming easier than ever and why more people than ever are building their own computers.
Ultimately, most builds will go smoothly. However, for those that don’t, it’s nice to know that you have a ton of support behind you to help you solve any problems that may arise.


Great article Brent! I really agree on #3. I skimped on my very first build and had to replace the power supply within 6 months.
Thanks for reading Dom!
It happens… in fact it’s probably the easiest mistake to make for first-time builders. More wattage should, in theory, equal better performance. However, those low-quality PSU manufacturers always advertise their products as better than they actually are.
Great tips, thanks! For me the 7th is the most important – as without another pc or at least tablet with internet connection, you can just not finish building – in case you forget something, or something just goes wrond – extra pc with internet acess is a must for any building/fixing process – learned it from own exoerience
Hey Victoria, thanks for reading and commenting!
I agree, having another computer is huge. The information available on the internet is invaluable during the building process. Especially if anything goes wrong.
Very good article, Number 2 is good idea because video card is one of important thing to make the appeareance good looking :).
Fantastic post, Having a good GPU and i7 Processor with 16GB of RAM is the perfect configuration for a highly speedy gaming PC.
I’ll remember these tips while buying new PC because I’m also a gaming fan!
So agree on #1! I could never understand why people go out and buy the cheapest components for their gaming builds. Unless you are doing it for the sole purpose of learning how to assemble a PC, I see no point in spending money on something that will soon become useless for gaming. Better save up and build a computer that will last!
Hi Brent! Thank you for this helpful article. This would surely help others build their own PC and save a couple of dollars.
I noticed that you didn’t specifically mention other hardware that should be considered like the processor. I agree that the best video card would allow us to play modern games with a high and satisfying FPS but sometimes, people who don’t know that much would experience hardware “bottlenecks”.
Usually, one or more components are holding back the performance of the PC. Even if I have the best video card in the whole world, I would not be able to unlock its full potential if I only have a cheap or outdated processor. The performance might improve a bit but it is not worth it.
One thing that should be emphasized, I think, is the “balance” and “optimization” of the whole system. Sometimes, bottlenecks are even present on the hardware itself. I don’t know if manufacturers do that intentionally to attract people to buy it even if it’s not worth it.
There’s a very simple 10-minute video on youtube that briefly explains about this topic that I think would help people to understand it better.
“Understanding Hardware “Bottlenecks” and How to Avoid Them” = Just search it on youtube.
This is a very interesting topic because building your own computer involves both art and science! Thank you for posting this, Brent. 🙂